The secret is at the end, but to get
there, we need to start at the beginning.
One of the great benefits of using Final
Cut Pro version 4 is the ability to customize it's keyboard shortcuts
to match your style.
Don't like "Fit to Window"
to be Shift-Z? Well then, move it to "Control-Option-F"
or any other key you desire. How? By following these six steps:
1)
Go to Tools -> Keyboard layout -> Customize
2) Unlock the padlock by clicking it
3) Click in the white, oblong search bar and type the
command you want to assign to a key combination (i.e. "fit")
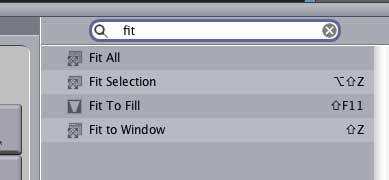
4)
Click the tab along the top that corresponds to the modifier
key, or keys, to which you want to assign this keyboard shortcut
(i.e. "ctrl-opt")
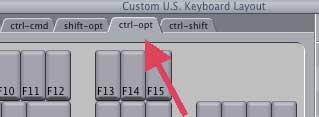
5)
Drag the command you want to use on top of the key to which you
want to assign the shortcut (i.e. "F").
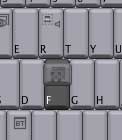
6)
Close the keyboard window
From now on, every time you press "Control-Option-F,"
Final Cut will fit whatever your working on into the window;
very helpful for resizing the timeline.
"Well, yes, of course," I hear
you say, "but there's nothing NEW here. We've always been
able to do that in FCP 4."
True, we HAVE always been able to create
new keyboard shortcuts in Final Cut. BUT, what about LiveType,
or SoundTrack, or, well, any other application you are currently
working with?
Wouldn't it be nice to create new keyboard
shortcuts in them, too? Or, how about remapping shortcuts that
you don't like?
Well, there's a new feature in OS 10.3.x
that makes creating customized keyboard shortcuts simple. And
here's how it works.
However, for this to work, you first
need to install OS 10.3 on your system.
Now, in this example, let's open LiveType
and find a menu that doesn't have a keyboard shortcut associated
with it.
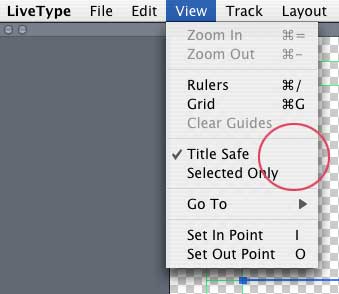
View -> Title Safe doesn't have a keyboard
shortcut. So, let's create one by following these steps:
1)
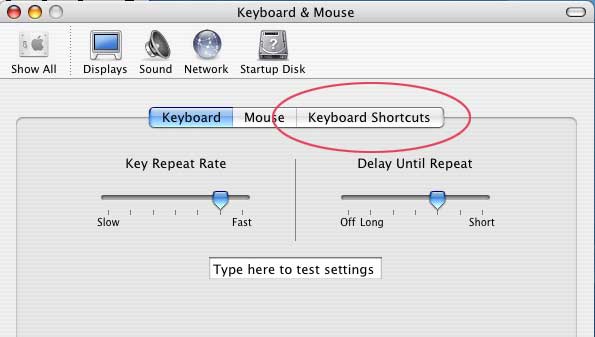
Open System Preferences -> Keyboard & Mouse
2)
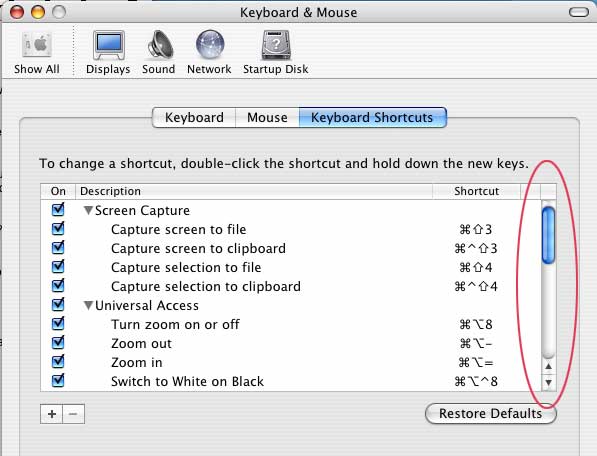
Click the Keyboard shortcuts tab on the right
3)
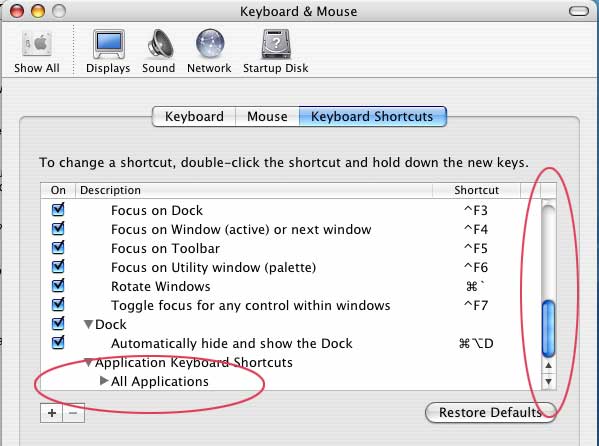
Scroll all the way down the list of shortcuts to the very bottom.
4)
Twirl down "All Applications," then click the Plus
( + ) key.

5) In
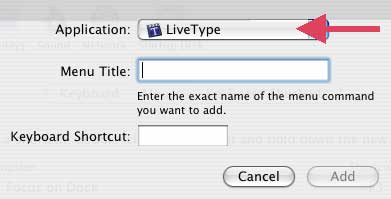
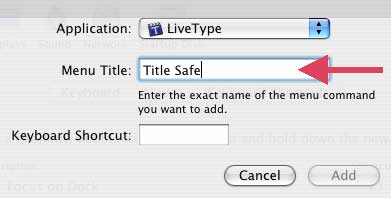
the sheet that slides down from the top of the window, select
"LiveType" from the pop-up Application menu.
6)
Then, and this is important, in the Menu Title field, type the
name of the menu EXACTLY as it appears in the application. In
our example, type "Title Safe" -- spelling, capitalization
and punctuation must be exact.
7)
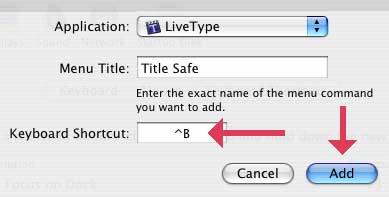
Then, in the Keyboard Shortcut field, type your shortcut. Again,
in this case, hold down the Control button and press B.
8)
Press the "Add" button and quit out of System Preferences.
9)
Open LiveType and pull down the View Menu. Ta-DA! Your new keyboard
shortcut is now installed as part of the application.
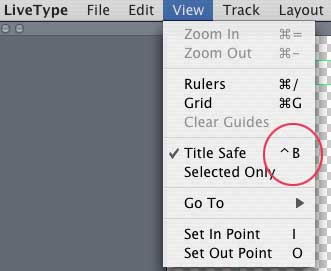
Very, very cool.
There are two additional secrets you
need to know:
1)
You can replace existing keyboard shortcuts with your own by
following this same procedure. For instance, you change View
-> Grid from "Command-G" to "Control-G"
by entering "Grid" in the Menu Title field and "Control-G"
in the Keyboard Shortcut field.
This gives you the power to change keyboard
shortcuts in ANY OS X application.
2)
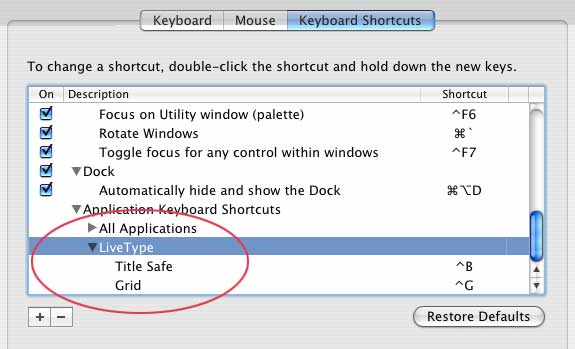
To remove the changes you made, go back to the Keyboard Shortcuts
and scroll down to the bottom of the list.
1)
Twirl down "All applications"
2) If you want to remove ALL your keyboard shortcuts from
LiveType, highlight LiveType and press the minus ( - ) key.
3) If you want to remove only ONE keyboard shortcut, twirl
down LiveType, highlight the shortcut you want to remove and
press the minus ( - ) key.
Very simple. Very cool.
This tip is from an upcoming issue of
"Larry's FCP Newsletter." This mostly-monthly
newsletter is free and you can sign up at: www.larryjordan.biz.
Larry Jordan is an Apple-Certified Trainer for Final Cut Pro
and DVD Studio Pro. He is also one of the first trainers in the
country to be Certified to teach the Advanced Level of Final
Cut. To learn more, visit: www.larryjordan.biz.
Text copyright 2004, by
Larry Jordan. All rights reserved.