|
|
   
| Review: - Using Core Melt's Sky Replace Plug-in |
April, 2010 
Using Core Melt's Sky Replace Plug-in
CoreMelt
Review by Steve Douglas
If you are anything like me you might have more sets of plug-ins than you could ever want or need. Some transitions, filters and generators I use very frequently and others languish seemingly forever without getting used since the day I first reviewed them. There are so many similarities between one company's ripple dissolve and another's, I just get used to using the ones I use. The others sit there.
I have owned Core Melt's Complete collection of plug-ins for some time now and only recently discovered their Sky Replace filter and found it amazing at just how much it can improve a clip whose sky background is either too blown out or too gray as a result of clouds. Sometimes we just can't control the weather and even though we might prefer to shoot against a blue sky that is not always possible. The Sky Replace filter is found in the Core Melt's Pigment-Color Tools folder, which contains an additional 23 color correction tools for Final Cut Pro, Final Cut Express and both Adobe After Effects CS3/CS4.
Surprisingly simple to use, Core Melt's Replace Sky has just enough useful parameters to work with and yet help you refrain from making a complete mess of your clips.
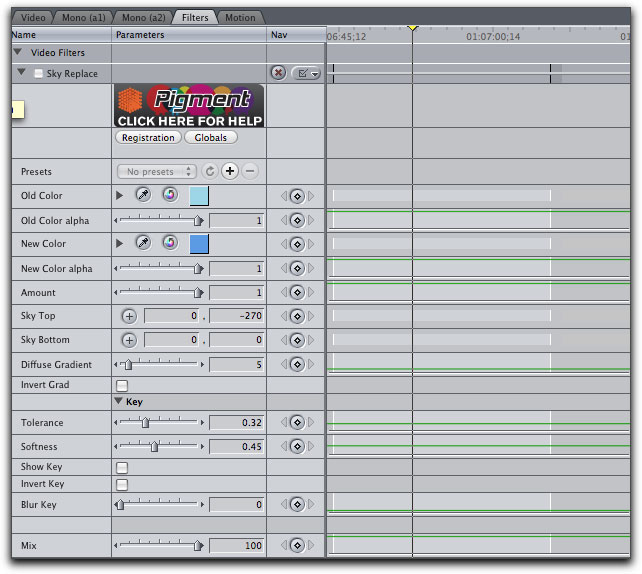
The parameters for the Core Melt Replace Sky filter.
I found it best to apply it to a clip and uncheck it to start with. Then, using the 'Old Color' eyedropper I clicked on the blown out sky in the background. Now, I check the Replace Sky on box making the filter active. You will immediately see an improvement to the sky appearance of your shot.
Originally shot with a dull gray and cloudy background, I quickly replaced the atmosphere as if it were shot under a sunny Caribbean sun.
The Core Melt Replace Sky filter basically creates a gradient for any color sky you wish to create. Naturally, this can be overdone but to help remove any sense of artificiality you can control both the amount of the gradient as well as its position. Clicking on the Sky Top and Sky Bottom parameters helps with the exact positioning of the newly colored sky and I found that using either took a few minutes to accurately position them as I wanted. In addition you can control the intensity of the new color by a judicious use of the Amount and Mix controls.
The original clip on the left and with the Sky Replace using an 81% mix on the right. This keeps that overcast look while still introducing color to the overall sky.
While it is plainly gray and overcast on the original screen grab on the left, I wanted to introduce a more stormy appearance so I introduced a bit of red into the picture.
The Diffuse Gradient control does just that but I found that it also creates a bit of a glow around the edges of the canvas and subject. If that is a look you are seeking, it might be just the thing. Both the Tolerance and Softness controls were very useful in maintaining a natural appearance of the new sky color. Too much use of the Softness controls tends to flatten out the sky appearance so just slight adjustments with it will be all you need. You can also invert the gradient and use the Key control parameters to help you see just how much of the gradient you are applying.
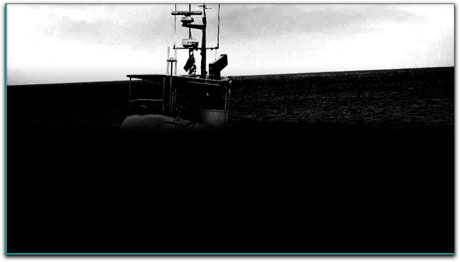
After applying the Sky Replace filter,
I can then invert the key to help adjust the location and appearance of the key itself.
The original clip on the left and with the Replace Sky filter set too strongly on the right. I will fix this utilizing the Tolerance control to make it more natural.
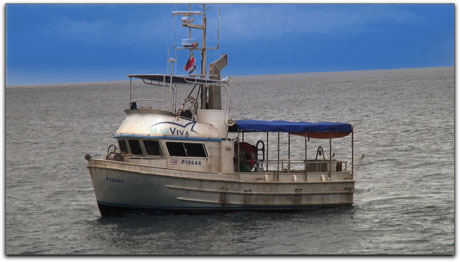
Adjusting the tolerance control,
color has been brought in while dissipating that previously overly artificial appearance.
Just to experiment with the Sky Replace filter's limitations I decided to add the Sky Replace filter a second time to the same clip. However, this time I used the eyedropper on the water instead of the sky. I found I could successfully morph the originally drab boat and atmosphere into something a bit more eye pleasing.
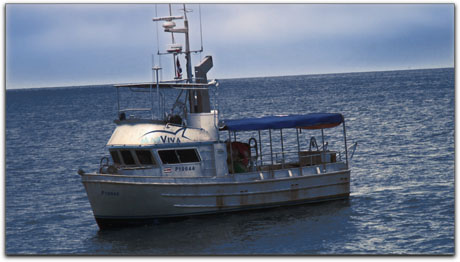
That's more like it.
I'm not sure just how long Core Melt's Sky Replace filter has been sitting in my cache of filters; probably a long time. I love learning new things, techniques and ways to utilize the many editing tools at my disposal. Now that I have discovered this very handy filter, I can foresee my using it frequently in the future. As I said, if you can't trust the weather, at least you can control the image.
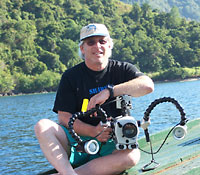 Steve Douglas is a certified Apple Pro for Final Cut Pro 7 and underwater videographer. A winner of the 1999 Pacific Coast Underwater Film Competition, 2003 IVIE competition, 2004 Los Angeles Underwater Photographic competition, and the prestigious 2005 International Beneath the Sea Film Competition, where he also won the Stan Waterman Award for Excellence in Underwater Videography and 'Diver of the Year', Steve was a safety diver on the feature film "The Deep Blue Sea", contributed footage to the Seaworld Park's Atlantis production, and productions for National Geographic and the History channels. Steve was a feature writer for Asian Diver Magazine and is one of the founding organizers of the San Diego UnderSea Film Exhibition. He is available for both private and group seminars for Final Cut Pro and leads underwater filming expeditions and African safaris with upcoming excursions to the Cocos Islands, Costa Rica, Lembeh Straits, Indonesia, and Wakatobi. Feel free to contact him if you are interested in joining Steve on any of these exciting trips. www.worldfilmsandtravel.com Steve Douglas is a certified Apple Pro for Final Cut Pro 7 and underwater videographer. A winner of the 1999 Pacific Coast Underwater Film Competition, 2003 IVIE competition, 2004 Los Angeles Underwater Photographic competition, and the prestigious 2005 International Beneath the Sea Film Competition, where he also won the Stan Waterman Award for Excellence in Underwater Videography and 'Diver of the Year', Steve was a safety diver on the feature film "The Deep Blue Sea", contributed footage to the Seaworld Park's Atlantis production, and productions for National Geographic and the History channels. Steve was a feature writer for Asian Diver Magazine and is one of the founding organizers of the San Diego UnderSea Film Exhibition. He is available for both private and group seminars for Final Cut Pro and leads underwater filming expeditions and African safaris with upcoming excursions to the Cocos Islands, Costa Rica, Lembeh Straits, Indonesia, and Wakatobi. Feel free to contact him if you are interested in joining Steve on any of these exciting trips. www.worldfilmsandtravel.com
This article first appeared on www.kenstone.net and is reprinted here with permission.
All screen captures and textual references are the property and trademark of their creators/owners/publishers.
|