|
   
| Tutorial: Final Cut Pro X 10.1 - What Went Where |
Dec, 2013
Final Cut Pro X 10.1 - What Went Where
By Richard Taylor
Where things went in the new version of Final Cut Pro X 10.1
01) Where are my Projects?
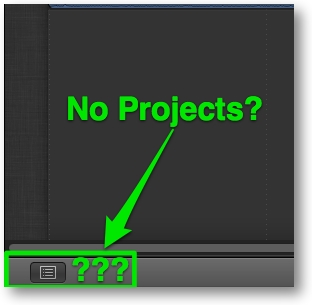
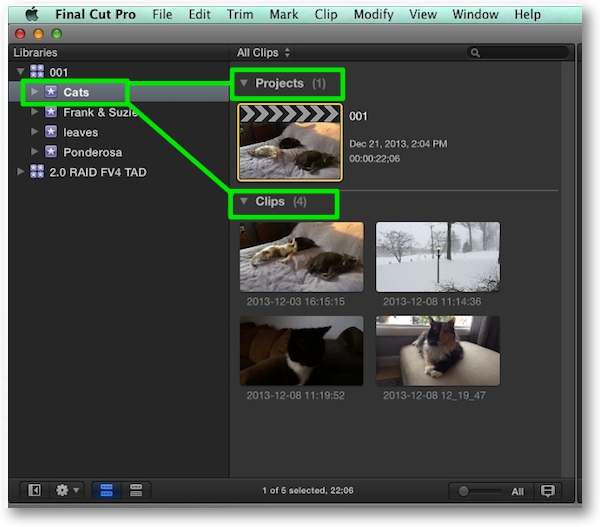
Don't worry. You can still have Projects. They are no longer stored in a Project Library in the Timeline window area, but are now part of an Event. Click on an Event in the Libraries panel and your Projects will be at the top of the browser window.
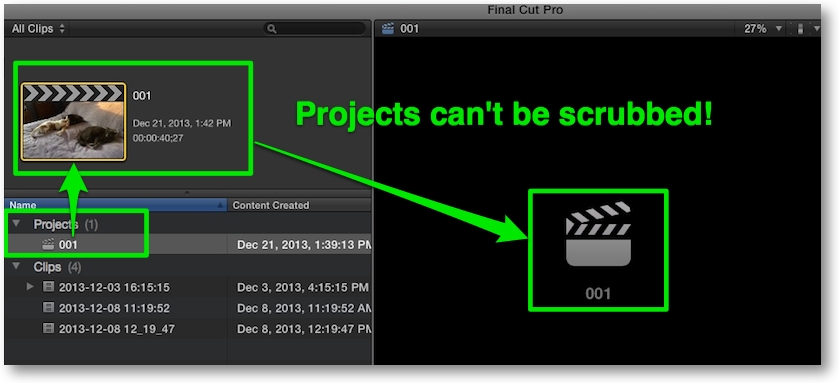
02) Projects can no longer be scrubbed with the skimmer.
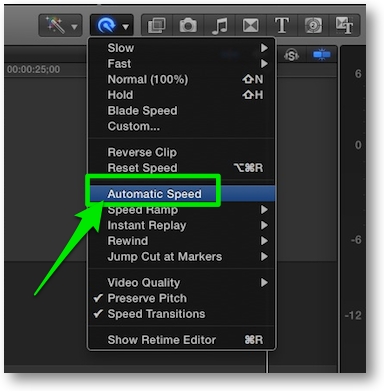
03) If you import a clip from your iPhone that was recorded at 120 fps slo-mo and you wanted it to play slo-mo at 30 frames per second, you used to be able to select the clip in the timeline and go to the Retime drop down menu and choose "Conform". Now you select "Automatic Speed". That will conform the clip to the frame rate of the timeline.
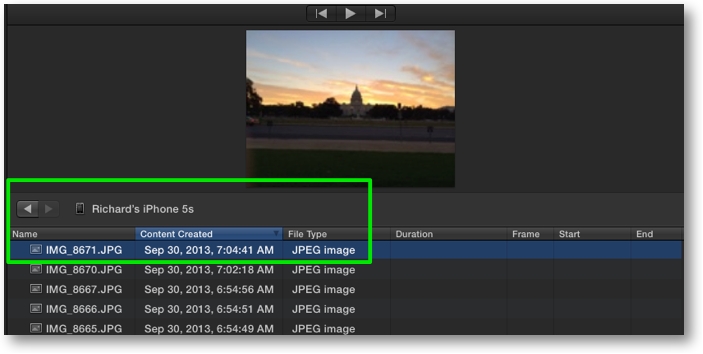
04) You can now import photos from your iPhone via the unified Import window.
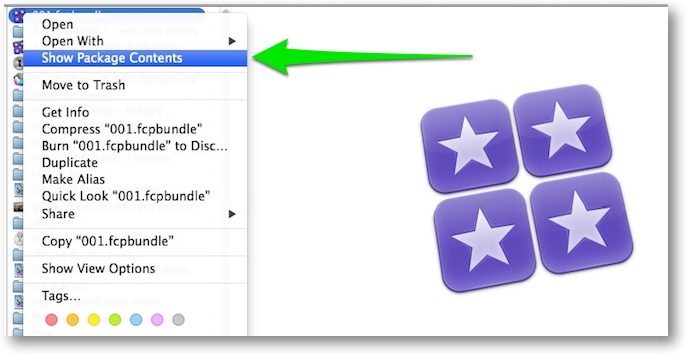
05) To see what's inside of your Library, find it in the finder, right click on it and choose "Show Package Contents". This procedure should be for viewing only! Do not modify anything inside of the Library at the finder level or your Library could become corrupt. This will reveal at least one Event with its associated media and any Projects you have made. Each Project file is stored in its own folder inside an Event folder.
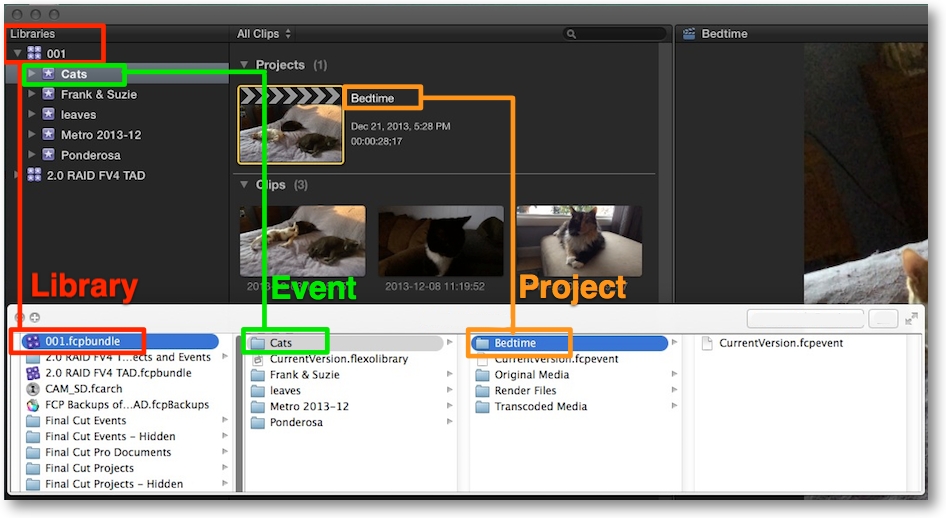
Hierarchal view in Final Cut Pro X and the corresponding Library, Event, and Project in the finder.
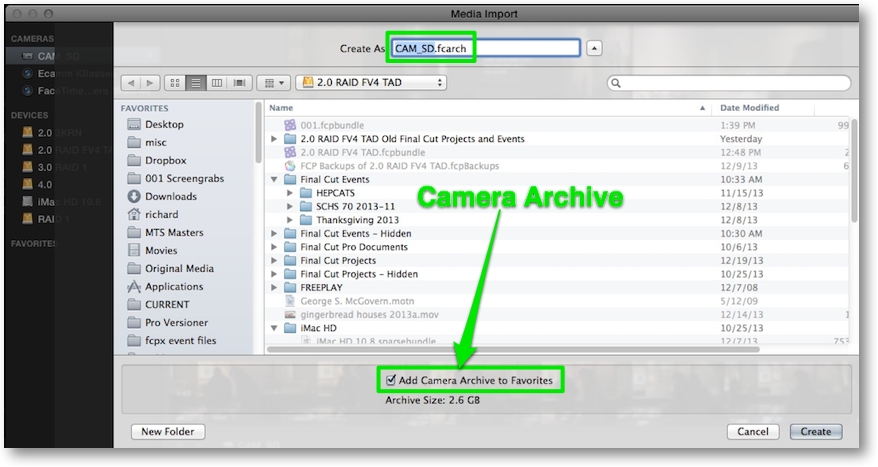
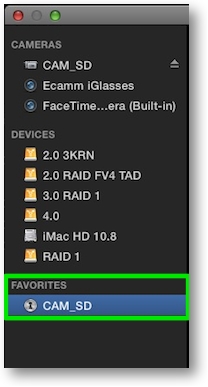
06) There is no longer a separate camera archive section in the unified Import window. Camera archives used to have to be saved at the top level of your hard drive. They now can be saved anywhere, even inside a folder. You now navigate to wherever your camera archive is on your hard drive and then import from there. You can select to have your camera archive show up in your Import window Favorites section by selecting the checkbox when you make the archive.
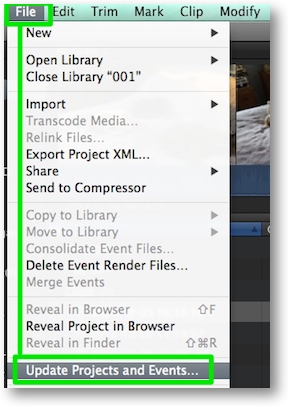
07) You update previous versions of events and projects, to the new Library structure, via the File menu.
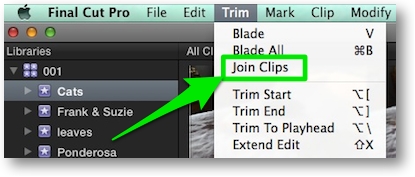
08) The new command to join a through edit is found in the Trim menu. It's called "Join Clips". Select a through edit and this item will be available.
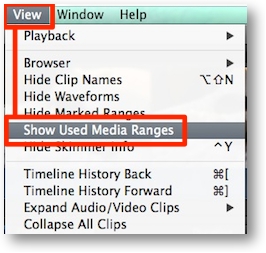
09) Under the View menu we have the new command "Show Used Media Ranges".
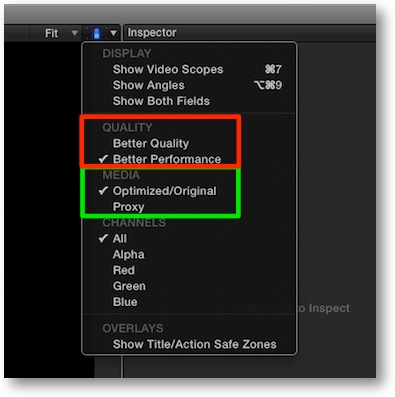
10) To switch between Proxy or Optimized/Original media and to choose between Better Quality or Better Performance, you now visit the Display lightswitch in the Viewer.
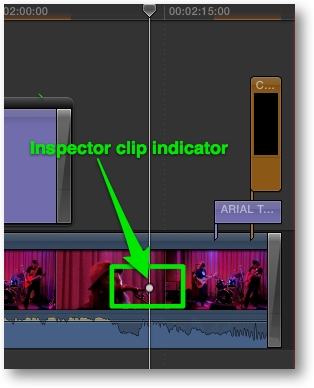
11) If no clips are selected in the Timeline, the playhead has a white dot. This indicates which clip's attributes are shown in the Inspector.
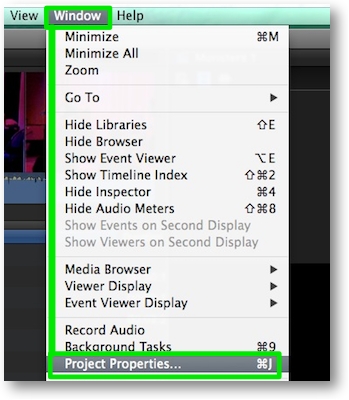
12) For some odd reason, the Project Properties are located in the Window menu. You can also use the shorcut Cmd-J.
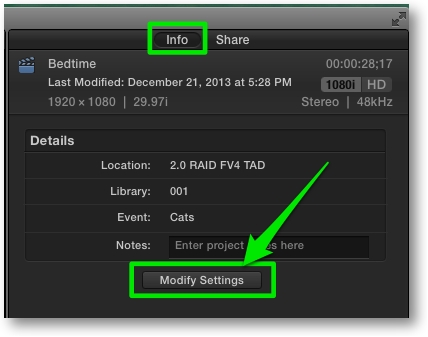
Or with a Project selected in an Event, go to the Info pane of the Inspector. There you will have the ability to modify the Project Settings. Also use the Inspector to modify a compound clip's settings.
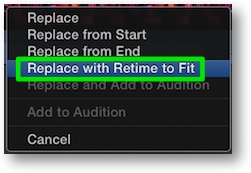
13) The Fit to fill edit has returned with a new name "Replace with Retime to Fit". Drag a clip from the browser and drop it on a timeline clip as a replace edit and this new option will be there.
Richard Taylor is an Editor/Producer and a Level 2 Apple Certified Trainer for Final Cut Pro from the Washington DC/Baltimore Maryland area. He can be reached via his Final Cut Pro X website FCPX.TV or on Twitter @RichardTaylorTV
Copyright © 2013 Richard Taylor. All rights reserved.
Apple and Final Cut Pro X are registered trademarks of Apple Inc
|