LAFCPUG: Glossary of Video Terms
From FAQwiki
Contents |
Glossary of Video Terms: A-H
(Work in progress)
Please note : Many of the terms and definitions contained within this glossary are copyright Apple Computer Inc. and may not be reproduced without permission from Apple. Items listed in blue are LAFCPUG moderator contributed definitions.
Numerical
2:2:2:4 pull-down : An efficient but low-quality pull-down method, primarily useful for previewing the output of real-time effects on an NTSC monitor. See also pull-down insertion, pull-down pattern.
2:3:2:3 pull-down : The most commonly supported pull-down pattern for NTSC devices. This option is ideal for recording to an NTSC device such as standard definition television, an MPEG-2 encoding device, or a high-end finishing system. See also pull- down insertion, pull-down pattern.
2:3:3:2 pull-down : The pull-down pattern used by DV devices that support advanced pull-down. See also pull-down insertion, pull-down pattern.
24@25 pull-down : A pull-down pattern used in Final Cut Pro when 24 fps media is sent to a 25 fps video output. In this pattern, 12 progressive frames are displayed, followed by 13 re-interlaced frames.
24@25 repeat : A pull-down pattern used in Final Cut Pro when 24 fps media is sent to a 25 fps video output. In this pattern, 24 progressive frames are played and the 25th frame is the 24th frame repeated.
3:2 pull-down : See 2:3:2:3 pull-down.
4:3 : The aspect ratio for broadcast video. The ratio of the width to the height of the visible area of the video frame, also called the picture aspect ratio, is 4:3, or 1.33.
8-bit precision : For video, a bit depth at which color is sampled. 8-bit color is common with DV and other standard definition digital formats. Some high definition acquisition formats are also recorded with 8-bit precision.
10-bit resolution : For video, a bit depth at which color is sampled. Certain standard and high definition video capture interfaces are capable of uncompressed, 10-bit capture.
16-bit resolution : A standard bit depth for digital audio recording and playback.
16:9 : A widescreen aspect ratio for video. The ratio of the width to the height of the visible area of the video frame, also called the picture aspect ratio, is 16:9, or 1.78. The 16:9 aspect ratio is used for high definition video.
16 mm : A film format for film and television presentations, which has a 4:3 aspect ratio.
24-bit resolution : A bit depth used for high-quality audio playback. 32-bit floating point resolution : An extremely high resolution bit depth used for lossless computation of audio or video data.
35 mm : A standard motion picture film format. This may be cropped during projection to create widescreen aspect ratios such as 1.66 or 1.85, or filmed and projected anamorphically for an aspect ratio of 2.40.
65 mm : A film format for shooting widescreen presentations. This format is usually printed with a soundtrack onto 70 mm film.
70 mm : A film format for widescreen projections, which has a 2.2:1 aspect ratio.
180-degree rule : When a new camera angle is more than 180 degrees different from the previous camera angle, a shot with two people will appear to reverse positions onscreen. When editing a scene with two people talking, it’s important not to cut to a shot that crosses the 180-degree line that connects them.
A
action safe area: 90% of the image area. Most of the time, anything in your video image that’s outside of this area won’t be displayed on a television screen, so any important material needs to be framed within the action safe area. Compare with title safe area. See overscan.
Adjust Line Segment pointer : A cross-shaped pointer that appears in the Timeline and Viewer when you move the pointer over a line that can be adjusted, such as a line segment between keyframes. The pointer has small arrows pointing up and down, indicating the directions in which a line can be moved.
advanced pull-down : See 2:3:3:2 pull-down.
AIFF (Audio Interchange File Format) : A cross-platform file format supported by a large number of digital video and audio editing applications. You can reduce the file size of AIFF files with compressors, although this reduces the quality. AIFF audio can use a variety of bit depths, but the three most commonly used are 8-,16-, and 24-bit.
alpha channel : An image channel in addition to the R, G, and B color channels that is used to store transparency information for compositing. Alpha channels are often 8-bit, but some applications support 16-bit alpha channels. In Final Cut Pro, black represents 100 percent transparency, and white represents 100 percent opacity. Only certain formats, such as Targa, TIFF, PICT, and the QuickTime Animation codec, support alpha channels.
alignment : When working with transitions, refers to whether the transition starts before the edit point, is centered at the edit point, or ends after the edit point.
ambience : A type of sound. Ambient audio includes background room noise, traffic noise, and atmospheric sound effects.
analog or analogue : A signal that consists of a constantly varying voltage level, called a waveform, that represents video and audio information. Analog signals must be digitized, or captured, for use by Final Cut Pro. VHS and Betacam SP are both analog tape formats. Compare with digital.
anamorphic : Visuals that are shot in a widescreen format and then squeezed into a 4:3 frame size. This can be done by using a video camera’s electronics or, optically, by using an anamorphic lens.
anchor item : When you first link multiple audio clip items to a video item in the Timeline, that video item is considered the “anchor” item to which the sync of all other linked audio items is compared. If you’re linking a group of audio items without a video item, the topmost audio item that appears in the Timeline acts as the anchor item.
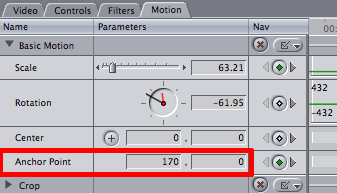
anchor point : In the Motion tab, the point that is used to center changes to a clip’s geometry when using motion effects. Any changes to the size, position, and rotation of a clip happen relative to this anchor point. A clip’s anchor point does not have to be at its center.
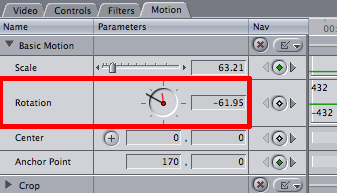
Angle control : A control used to rotate a clip around its center axis without changing its shape. Located in the Motion tab of the Viewer. In the Angle control, the black hand indicates the current angle of the clip, and the small red hand indicates how many total rotations forward or backward have been specified.
A-only edit : An edit of the audio files or video files of the base track only.
A-roll edit : An edit of clips that contain audio data from the base track or a narration.
aspect ratio : A film or video frame’s width-to-height ratio on any viewing screen. The most common aspect ratio is 4:3, used for regular television screens. An aspect ratio of 16:9 is increasingly used for high definition video.
assemble edit mode : In linear systems, assemble edit mode lays down new video, audio, and control tracks all at once. It usually requires anywhere from 3 to 5 seconds of pre-roll before you edit to tape. In Final Cut Pro, assemble edit mode is a function that writes the sequence or clip to tape at the designated In point, or at the current point. Assemble edit mode usually breaks the timecode and control track at the end of the edit.
attenuate : To lower an audio signal’s level.
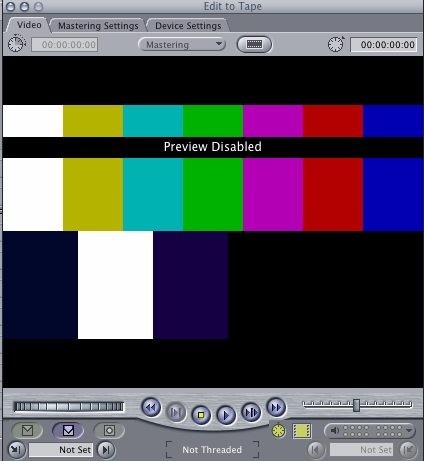
audio channel indicator : An icon in the Edit to Tape window that indicates which audio tracks are being output.
audio clip : A media clip containing audio tracks.
audio meter : A meter that lets you monitor audio output levels from your computer. You use the audio meters in Final Cut Pro when you capture, mix, and outputting your program.
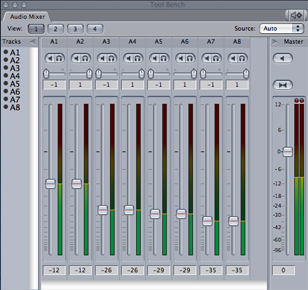
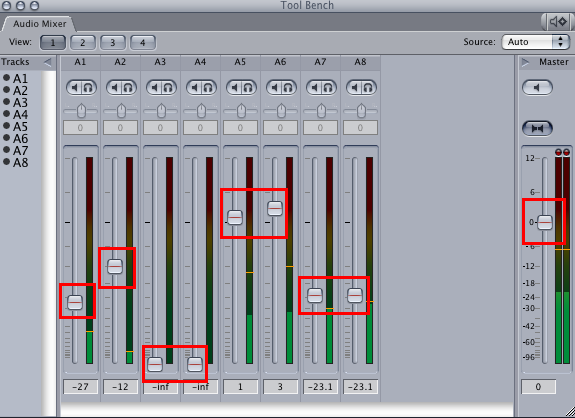
Audio Mixer : A tab in the Tool Bench window. The Audio Mixer is the primary tool in Final Cut Pro for mixing multiple channels of a program’s audio in real time.
audio track : A track in the Timeline into which you can edit audio clip items.
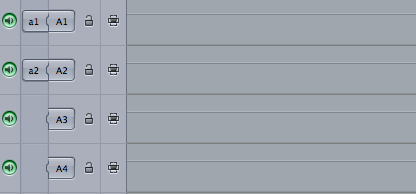
Audio Units : The standard real-time audio filter format for audio applications running on Mac OS X.
Auto Render : A feature that allows Final Cut Pro to render open sequences whenever a specified number of idle minutes have passed.
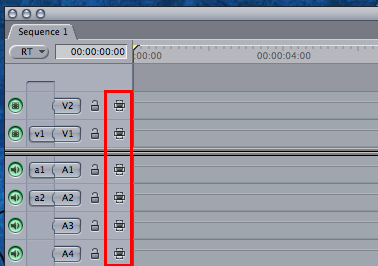
Auto Select control : Enabling the Auto Select controls of specific tracks in the Timeline limits which tracks are affected by various functions such as copying, pasting, deleting, the Match Frame command and so on.
Note: You can think of In and Out points as limiting your edits in the horizontal (time) dimension and Auto Select as limiting your edits in the vertical dimension.
average loudness : The average audio level in decibels. Determines the apparent volume of an audio signal to a listener.
averaging meter : A meter that displays the average audio level. Unlike peak meters, which always show the exact level of an audio signal including every peak, averaging meters have weighted ballistics so that they give a more readily apparent representation of the average loudness of an audio signal.
AVI (Audio-Video Interleaved) : Microsoft’s older standard format for digital video. It is a filetype "wrapper" and like Quicktime .mov, .avi can contain a variety of CODECs such as DV, DiVX, Indeo® Video...
axis : The pitch, roll, and yaw of a camera shot determines its axis. In an edited sequence, the axis can be used to determine visual continuity from shot to shot.
B
back light : A light source that comes from behind and above the subject. It outlines the subject and differentiates it from the background. Also called a rim light.
batch capture : A process in which previously logged clips’ media is captured from a VTR or camcorder to your hard disk. The timecode in each clip is used to automatically cue source tapes, using remote device control, to the location of each clip.
batch compression : A process in which multiple clips or sequences are automatically compressed to new media files, without manually overseeing each one.
batch list : A tab-delimited text file that contains information about offline clips that you want to capture and use in your project. Batch lists can be exported from or imported into your Final Cut Pro project file. After you import a batch capture list into Final Cut Pro, your project contains a series of offline clips, one for each entry in the batch capture list. You then need to recapture or reconnect the clips to their media.
batch recapture : A process in which you recapture, at a higher resolution, the parts of logged clips that you actually use in your sequences. Helps to conserve disk space.
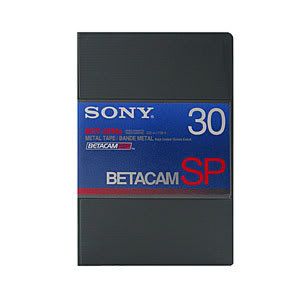
Betacam SP : A high-end, standard definition component analog video format.
Supports four tracks of analog audio. Note that Sp Beta boxes and tapes are grey.
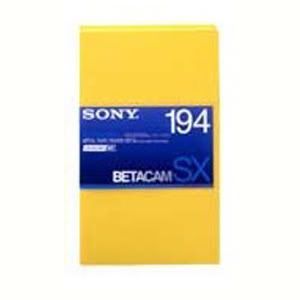
Betacam SX : A standard definition, 8-bit digital videotape recorder format with 10:1 video compression using MPEG-2 compression, and 4:2:2 color sampling. Supports four tracks of audio with 16-bit, 48 kHz audio sampling. Note that SX Beta boxes and tapes are yellow.
Bezier curve : In its simplest form, a line defined by two end points and two associated control points, or “handles”. Pulling the control points adjust the line into a curve. Named after Pierre Bezier, who discovered the mathematical formula for these curves. In Final Cut Pro, Bezier curves are used to adjust keyframed effects and to create curves in motion paths.

Bezier handles : Controls that let you modify the curve of a line segment between a handle and the next point on either side of it. The farther a handle is dragged from its vertex point, the more it bends or curves the line segment. Used for smoothing keyframes.
bin : A container (or folder) inside of the Browser that can contain clips, sequences, transitions, effects, and generators. You use bins to organize these elements, sort them, add comments, rename items, and so on.

black level : An analog video signal’s voltage level for the color black, represented by IRE units. Absolute black, or setup, is represented by 7.5 IRE for NTSC in the United States and 0 IRE for NTSC in Japan and for PAL.
blue or green screening : A special effects technique that allows you to derive an alpha channel or matte from the blue or green background of a video clip in order to make it transparent for purposes of compositing against other clips. Blue-screen technology is what makes weather forecasters appear to be standing against an animated map, when in reality they’re standing in front of a blue wall. Also known as chroma keying. See also keying.
boosting : The act of raising an audio level.
boundary : Refers to either the In or Out point of a clip in the Timeline.
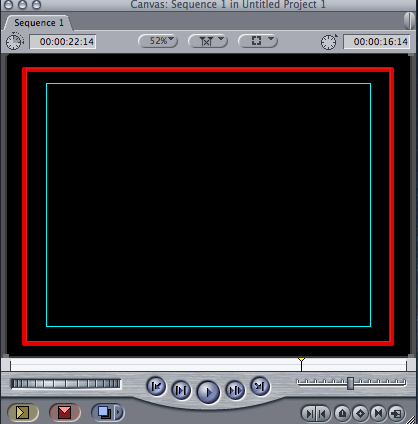
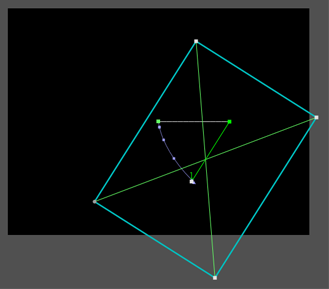
bounding box : An 'invisible' box that surrounds an image or group of images and defines their edges. Useful for moving or distorting items in the canvas.
broadcast : Refers to signals intended for delivery on television, as well as network delivery to a wide audience. Broadcasters may have strict guidelines for the signal quality of programs for air. Broadcast quality is a phrase often used when referring to these guidelines.
broadcast legal : Broadcast facilities have limits on the maximum values of luma and chroma that are allowable for broadcast. If a video exceeds these limits, distortion can appear, resulting in unacceptable transmission quality. You can use the Final Cut Pro video scopes and range-checking options to make sure that the luma and chroma levels you set stay legal.
B-roll : A term used to describe alternate footage shot to intercut with the primary shots used in a program. B-roll is frequently used for cutaway shots.
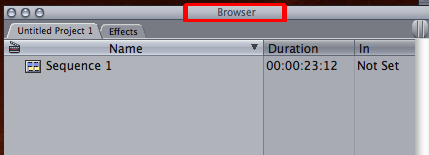
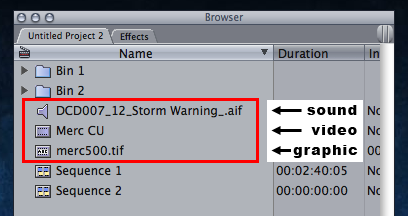
Browser : The central storage area in Final Cut Pro, where you organize all of the source material used in your project. The Browser lists all elements—video and audio clips, graphics clips, and sequences—in a project. Each project is represented by a tab that contains that project’s file. You can further organize your media clips within a project using bins, which are similar to folders.
C
calibrate : To adjust a feature for accuracy.
Canvas : In Final Cut Pro, the Canvas is the equivalent of a record monitor in a tape-to-tape editing system. It works with the Timeline, displaying the frame at the position of the playhead in the Timeline and showing what your edited sequence looks like when it is played. Changes you make to a sequence in the Timeline are seen when you play back that sequence in the Canvas. If you modify clips in the Canvas, the changes are stored with the clips in the Timeline. You can also use the Canvas to perform edits.

capture : To move NTSC or PAL video or audio from tape to a digital format for use by Final Cut Pro. An older term for capturing is digitizing. Captured video clips appear on the specified scratch disk as a series of QuickTime movie files. See also digitize.
center point : Defines a clip’s location in the X/Y coordinate space in the Motion tab of the Canvas.
CG : Abbreviation for Character Generator. A specialized hardware device used for creating titles.
CGI : Abbreviation for Computer-generated imagery.
channel 1 : Typically the left audio channel in a stereo recording.
channel 2 : Typically the right audio channel in a stereo recording.
channels : When used to describe video, can refer to color channels or alpha channels. Color and transparency information for video and graphics clips is divided into individual channels. Each individual color channel represents one of the three individual primary colors that mix together to represent the final image. Each channel has a bit depth; most graphics and video files are 8 bits per channel, meaning that there are 256 levels of color or transparency for each channel.
chip chart : A grayscale chart that is placed next to the slate at the beginning of every shot. During postproduction, the color chart can be used to correct each shot so that the whites, blacks, and colors can be perfectly reproduced during editing.

chroma : The color information contained in a video signal, consisting of hue (phase angle), which represents the color itself, and saturation (amplitude of the color subcarrier), which represents the intensity of the color.
chroma keying : See blue or green screening.
clip : An item in a Final Cut Pro project representing video, audio, or graphics media files on disk.
clipping : Distortion occurring during the playback or recording of digital audio because of a signal that exceeds the maximum sample value of 0 dBFS.
CMYK : Abbreviation for Cyan Magenta Yellow Black. The color space commonly used for images that are printed with four-color ink on offset presses.
CODEC or codec : Short for compressor/decompressor, or encode/decode. A software component used to translate video or audio from its analog uncompressed form to the digital compressed form in which it is stored on a computer’s hard disk. DV, Photo, JPEG, and Sorenson Video are common QuickTime video codecs. Also referred to as a compressor.
color balance : Refers to the mixes of red, green, and blue in a clip. In Final Cut Pro, you can adjust the color balance of the highlights (bright areas), midtones, or shadows (dark areas) of your clip using the Color Corrector 3-way filter.
color bars : A standard color test signal displayed as columns, often accompanied by a reference audio tone. Color bars are used to adjust the video signal of the incoming source tape to maintain proper color from tape to computer and through to output. Color bars are also output to a master tape so that accurate duplicates (dubs) of the tape can be made.

color correction : A process in which the color of clips used in an edited program is evened out so that all shots in a given scene match. Color correction is generally one of the last steps in finishing an edited program. The color correction tools in Final Cut Pro give you precise control over the look of every clip in your project by adjusting the color balance, black levels, mids, and white levels of individual clips.
color depth : The possible range of colors that can be used in a movie or image. There are generally four choices with computer graphics— 8-bit (grayscale), 16-bit, and 24-bit (millions of colors). Higher color depths provide a wider range of colors but require more space for a given image size. Broadcast video is generally 24-bit, with 8 bits of color information per channel. See also channels.
colorist : A professional who performs color correction. The colorist, in consultation with the cinematographer, director, or producer, works shot by shot to determine the look of each clip according to the needs of the project.
component video : A type of analog video signal in which the luma and chroma signals are recorded separately for better video quality. Professional video equipment, such as a Betacam SP deck, uses component Y?CRCB (also called component YUV) video inputs and outputs. Another form of component video, component RGB, is not as widespread on video gear as component Y?CBCR.
composite video : An analog video signal that combines all chroma and luma information into a single waveform running through a single cable. This can result in analog “artifacts,” affecting the quality of the video signal. Nearly all video equipment has composite inputs and outputs.
compositing : A process in which two or more images are combined into a single frame. This term can also describe the process of creating various video effects.
compression : The process by which video, graphics, and audio files are reduced in size. “Lossy” compression refers to a process of reducing video file sizes through the removal of redundant or less noticeable image data. Lossless compression reduces file sizes by mathematically consolidating redundant image data without discarding it. See also codec.
contrast : The difference between the lightest and darkest values in an image. High-contrast images have a large range of values from the darkest shadow to the lightest highlight. Low-contrast images have a more narrow range of values, resulting in a “flatter” look.
coverage : A series of medium shots and close-ups, taken after the master shot, all of which cover the same material in the script. Used when shooting a scene with continuity. These shots are called coverage because they’re often used to cover different edits made in the scene.
crop : To mask a specified amount from the total frame size of an image. You can crop the top, left, right, and bottom of an image independently.
cut : An edit in which one clip immediately follows another, with no transition effect. This is the simplest type of edit.
cutaway shot : A shot that is related to the current subject and occurs in the same time frame. For example, an interviewer’s reaction to what is being said in an interview is a cutaway shot. Often, a cutaway shot is used to eliminate an unwanted visual section of another shot. The audio usually remains continuous, helping to make the cutaway less noticeable.
D
D1 : Has 2 definitions, see below.
1. A standard definition digital videotape recorder format that records an 8-bit uncompressed component video signal with 4:2:2 color sampling. Conforms to the ITU-R BT 601 4:2:2 format (formerly CCIR-601). Recorded using 19 mm tape. Supports four tracks of audio.
2. D1 is often used to describe the standard pixel dimension and display ratio used in PAL & NTSC Standard Definition digital video. D1 NTSC is 720x486 pixels (40:27) and displayed 4:3 D1 NTSC widescreen is also 720x486 pixels (40:27) but displayed as 16:9 anamorphic D1 PAL is 720x576 pixels (5:4) and displayed 4:3 D1 PAL widescreen is also 720x576 pixels (5:4) but displayed as 16:9 anamorphic.
D2 : A standard definition digital videotape recorder format that records an 8-bit uncompressed composite video signal with 4Fsc color sampling. Recorded using 19 mm tape. Supports four tracks of audio.
D3 : A standard definition digital videotape recorder format that records an 8-bit uncompressed composite video signal with 4Fsc color sampling. Recorded using 1/2 inch tape. Supports four tracks of audio.
D5 : A standard definition digital videotape recorder format that records a 10-bit uncompressed component video signal with 4:2:2 color sampling. Recorded using 1/2 inch tape. Supports four tracks of audio.
D9 : Also known as Digital-S. A standard definition digital videotape recorder format that records an 8-bit, 2:1 DCT compressed component video signal with 4:2:2 color sampling. Recorded using 1/2 inch tape. Supports four tracks of audio.
data rate : The speed at which data can be transferred, often described in megabytes per second (MB/sec.) or megabits per second (Mbps). The higher a video file’s data rate, the higher quality it will be, but the more system resources (processor speed, hard disk space, and performance) it will require. Some codecs allow you to specify a maximum data rate for a movie during capture.
DAW (Digital Audio Workstation) : A digital editing and recording device or software application used for editing multitrack audio for music or audio postproduction.
decibel (dB) : Unit of measurement for sound levels; a logarithmic scale used to describe the loudness of sound as perceived by the human ear. (1 dB corresponds to approximately the smallest volume change that the average human ear can perceive.) For digital audio, dBFS is the standard decibel unit of sound level measurement. See also digital full scale.
decompression : The process of creating a viewable image for playback from a compressed video, graphics, or audio file. Compare with compression.
desaturate : To remove color from an image. 100 percent desaturation results in a grayscale image.
destination track : The track a particular source item is edited into in the Timeline, as defined by the Source and Destination controls in the Timeline patch panel.
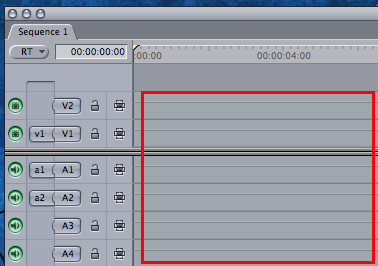
destination track controls : Source and Destination controls in Timeline tracks that allow you to specify which tracks source clip items are edited into in the Timeline.
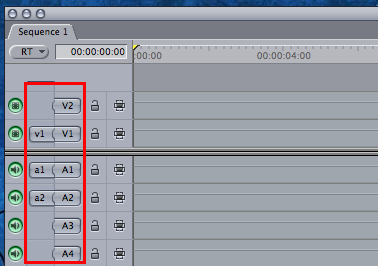
device control : Technology that allows Final Cut Pro to control an external hardware device, such as a video deck or camera. Three protocols are used most frequently to control video devices: serial device control via the RS-422 and RS-232 protocols, and FireWire for DV camcorders and decks.
dialogue : The recorded audio of one or more people speaking in a video clip. The designated dialogue track in an editing project is likely to include most of the location audio that was captured along with the video.
digital : A description of data that is stored or transmitted as a sequence of 1s and 0s. Most commonly, refers to binary data represented using electronic or electromagnetic signals. QuickTime movie files are digital. Compare with analog.
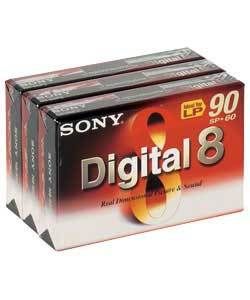
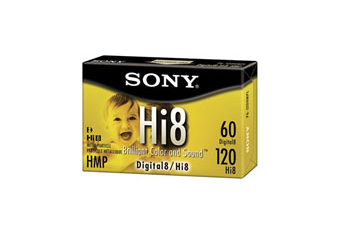
Digital-8 : A standard definition consumer digital video format that records a DV video signal onto Hi-8-style tapes.
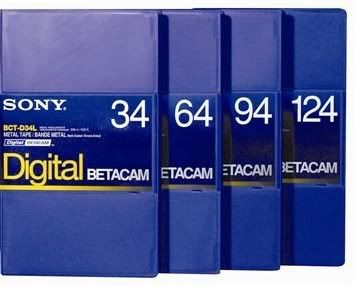
Digital Betacam : A standard definition 10-bit digital videotape recorder format with 2:1 video data compression and 4:2:2 color sampling. Supports four tracks of audio with 20-bit, 48 kHz audio sampling. Note that (Sony) Digibeta boxes are blue, and the tapes are grey and black.
digital full scale : The full audio signal range that can be recorded digitally without distortion.
Digital-S : See D9.
digital video : Video that can be captured, manipulated, and stored using a digital format, such as QuickTime. A digital video camcorder, for example, is a video camera that records images digitally on a medium such as tape. Because the signal is digital, it can be easily transferred to your computer.
digitize : To convert an analog video signal into a digital video format. A method of capturing video. See also capture.
disabled track : A track that has had its Track visibility control disabled. Disabled tracks will not output to tape or be rendered into a QuickTime file for output.
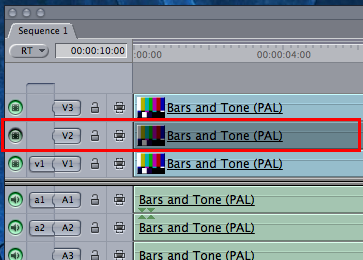
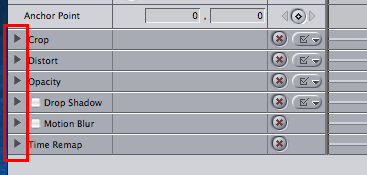
disclosure triangle : A small triangle you click to show or hide details in the interface.
distort : To change the shape of a clip by moving a corner point independently of the other corner points. Also, to squeeze a clip horizontally or vertically to change the ratio of its width to its height (the aspect ratio).
downmixing : Also referred to as mixing down, the process used to combine multiple audio channels to a single stereo (or dual mono) pair.
DPI : Dots Per Inch Is the measure of how many individual printed dots per inch of paper are printed out. It is also the number of pixels scanned per inch of source material. It has no bearing in video except where you print out or scan in.
Please read the FAQ on DPI
drop frame timecode : NTSC timecode that skips ahead in time by two frame numbers each minute, except every tenth minute, so that the timecode agrees with the actual elapsed clock time. (Timecode numbers are skipped, but actual video frames are not skipped.) This skipping corrects for NTSC’s actual frame rate of 29.97 fps. It corrects for an inaccuracy of 3 seconds and 18 frames per hour in comparison to actual elapsed time when non-drop frame timecode is used. To avoid confusion, dropframe timecode should be avoided in film-based productions. Compare with non-drop frame timecode.
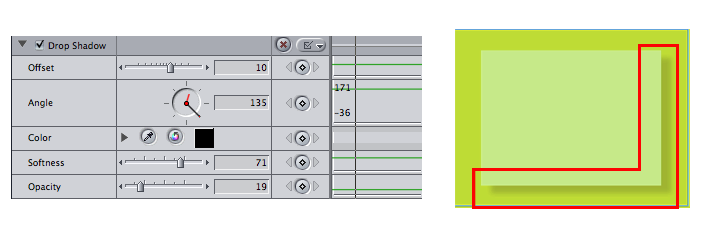
drop shadow : An effect that creates an artificial shadow behind an image. Typically used with graphics and text.
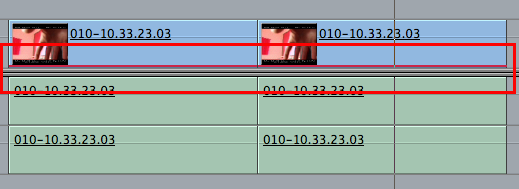
dual system recording : A recording process in which video is captured on one recording device and audio is recorded on another. Dual system audio must be synchronized onto the source videotapes prior to capture, or synced up in Final Cut Pro.
duplicate frames indicator : Colored bar that appears at the bottom of a clip’s video item in the Timeline, indicating that frames are duplicated elsewhere in the sequence. Useful for editing film where duplicate frames can cause complications during the final negative cut.
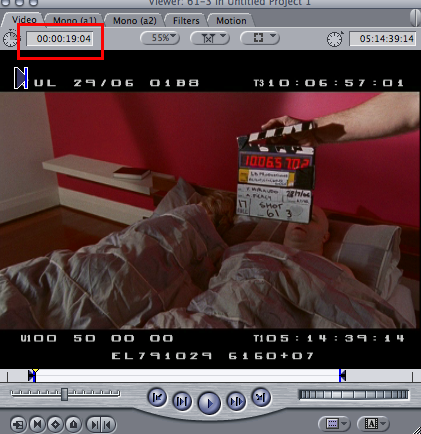
duration : The length of time between a clip’s In and Out points.
DV : Digital Video. A standard definition digital videotape recorder format that records an 8-bit, 5:1 compressed component video signal with 4:1:1 color sampling (PAL uses 4:2:0). Recorded using 1/4 inch tape. Supports two tracks of audio with 16-bit, 48 kHz audio sampling, or four tracks of audio with 12-bit, 32 kHz audio sampling.
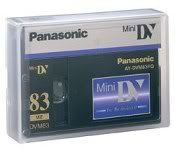
DVCAM : A standard definition digital videotape recorder format that records an 8-bit, 5:1 compressed component video signal with 4:1:1 color sampling (PAL uses 4:2:0). Recorded using 1/4 inch tape. Supports two tracks of audio with 16-bit, 48 kHz audio sampling, or four tracks of audio with 12-bit, 32 kHz audio sampling.
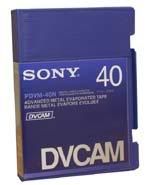
DVCPRO : A standard definition digital videotape recorder format that records an 8-bit, 5:1 compressed component video signal using 4:1:1 color sampling (PAL uses 4:2:0). Recorded using 1/4 inch tape. Supports two tracks of audio with 16-bit, 48 kHz audio sampling. Note that DVCPro tapes also come with red, blue and grey tops. These are indications of the tape size, not the format, and can all be used for DVCPro, DVCPro 50 and DVCPro HD.
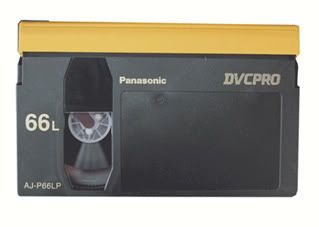
DVCPRO 50 : A standard definition digital videotape recorder format that records an 8-bit, 3.3:1 compressed component video signal with 4:2:2 color sampling. Recorded using 1/4 inch tape. Supports four tracks of audio with 16-bit, 48 kHz audio sampling.
DVCPRO HD : A high definition video format that records an 8-bit compressed component video signal with 4:2:2 color sampling. Both 720p and 1080i are supported. Includes up to eight tracks of audio with 16-bit, 48 kHz audio sampling. Recorded using 1/4 inch tape. The total data rate is 100 Mbps.
DVD : Digital Versatile Disc. A disc that is the size of a CD, but that uses higher density storage methods to significantly increase its capacity. Although usually used for video distribution, DVD-ROM discs can also be used to store computer data.
dynamic range : The difference, in decibels, between the loudest and softest parts of a recording.
E
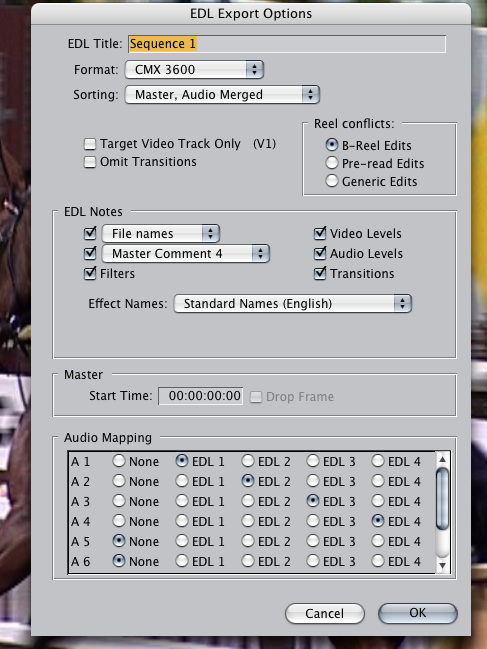
EDL (Edit Decision List) : A text file that uses the source timecode of clips to sequentially list all of the edits that make up a sequence. EDLs are used to move a project from one editing application to another, or to coordinate the assembly of a program in a tape-based online editing facility.
editing : The process of combining and arranging audio, video, effects, transitions, and
graphics in a sequence to produce a program.
edit point : (1) Defines what part of a clip you want to use in an edited sequence. Edit points include In points, which specify the beginning of a section of a clip or sequence, and Out points, which specify the end of a section of a clip or sequence. (2) The point in the Timeline in an edited sequence where the Out point of one clip meets the In point of the next clip. This edit point can be selected for various operations.
Edit to Tape : In Final Cut Pro, the Edit to Tape command lets you perform frame- accurate insert and assemble edits to tape.
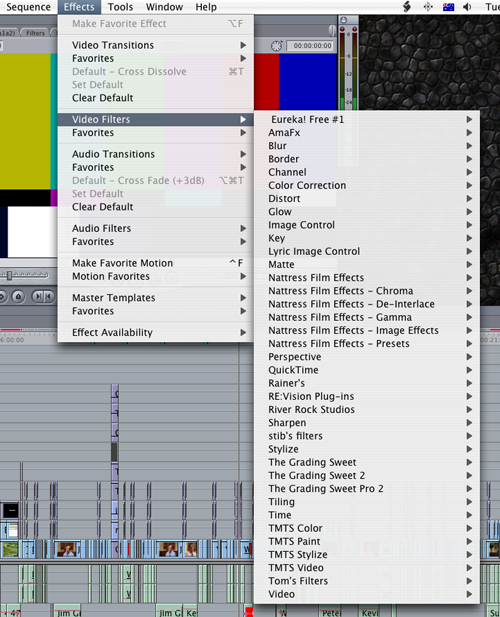
effects : A general term used to describe all of the Final Cut Pro capabilities that go
beyond cuts-only editing. See filters, generators, and transitions.
exposure : The amount of light in video or film images. Exposure affects the overall brightness of the image as well as its perceived contrast.
extend edit : An edit in which the edit point is moved to the position of the playhead in the Timeline. It allows you to move an edit point between two clips quickly. An extend edit overwrites any clips that come between the selected edit point and the playhead. It does not affect the overall duration of a sequence.
eyeline match : During the intercutting of shots, refers to cutting from a clip of a person looking at something to a clip containing the object that is being looked at.
F
faders : In the Audio Mixer, vertical sliders used to adjust the audio levels of clips at the position of the playhead. Using the fader, you can adjust the audio level of a clip on a smooth logarithmic scale ranging from +12 dB to –Inf dB (otherwise known as silence.)
favorite : A customized effect that is used frequently. You can create favorites from most
of the effects in Final Cut Pro.
field : Half of an interlaced video frame consisting of the odd or the even scan lines. Alternating video fields are drawn every 1/60th of a second in NTSC video to create the perceived 30 fps video. There are two fields for every frame, an upper field and a lower field.
filters : Effects you can apply to video or audio clip items. Filters affect the visual or aural quality of the clip to which they’re applied. For example, a video filter might change the colors of your image, while an audio filter might add some reverberance, making actors sound as if they’re in a huge space. In addition to using the filters that come with Final Cut Pro, you can use third-party filters.
finishing : The process of reassembling the clips used in the final edit of a program at
their highest quality. Finishing may involve recapturing offline resolution clips at full
resolution, rerendering effects, then outputting the final program to tape. Finishing
may also involve extra steps that were not taken in the offline edit, such as color
correction.
finishing on tape : The process of using the EDL from an offline edit to reassemble a sequence from the original source tapes in an online tape-to-tape editing suite.
FireWire : The trademarked Apple name for the IEEE 1394 standard. A fast and versatile interface used to connect DV camcorders to computers. FireWire is well suited to applications that move large amounts of data, and can also be used to connect hard disks, scanners, and other kinds of computer peripherals.

fit to fill edit : An edit in which a clip’s speed is adjusted to fit a specified duration in a sequence.
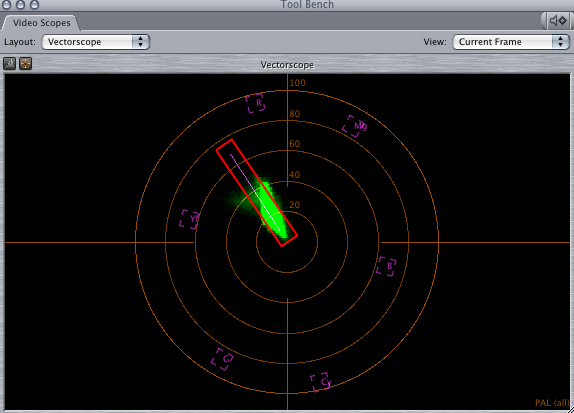
flesh tone : A special marker in the Final Cut Pro Vectorscope that indicates an area of appropriate range for all shades of skin color. When calibrating a tape’s color in preparation for capture or when using one of the color corrector tapes, the flesh tone marker can be used as a guide for adjusting the hue in order to make sure the skin tones look correct.
frame : A single still image. Film and video are made up of a series of these images.
While a film frame is a single photographic image, an interlaced video frame contains
two fields.
frame blending : A process of visually averaging frames together over time to create smoother motion. This is often useful when playing back clips in slow motion, to smooth otherwise jerky motion.
frequency : The number of times a sound or signal vibrates each second, measured in cycles per second, or hertz (Hz). Audio recordings are made up of a vast collection of waveforms, using many different frequencies of sound. Each frequency in a recording is associated with an audio pitch. For example, the note generated by each key of a piano is at a specific frequency.
G
gain : The amount an audio or video signal is boosted. In video, this increases the white level; in audio, this increases the volume.
gamma : A curve that describes how the middle tones of an image appear. Gamma is a nonlinear function often confused with “brightness” or “contrast.” Changing the value of the gamma affects middle tones while leaving the whites and blacks of the image unaltered. Gamma adjustment is often used to compensate for differences between Macintosh and Windows video graphics cards and displays.
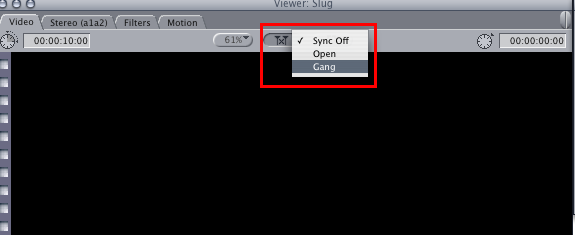
ganged : The behavior of the playheads in the Viewer and Canvas when they’re locked together, so that they move as one.
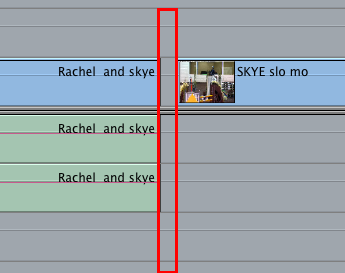
gaps : Locations in a sequence where there is no media on any track. When output to video, gaps in an edited sequence appear as black sections.
gear down : To slow down a mouse operation and make it more precise by holding down the Command key while dragging an item or control. This can be helpful when dragging clips if, for example, the Timeline is zoomed out so that clips look small. It’s also useful to gear down if you want to make very small changes to an edit point, a keyframe parameter, or a volume level.
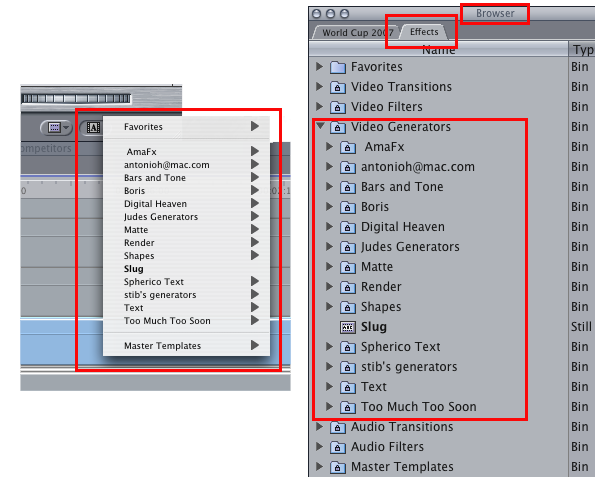
generators : Clips that are synthesized by Final Cut Pro. Generators can be used as different kinds of backgrounds, titles, and elements for visual design.
H
handles : Extra footage beyond a clip’s In and Out points. Handles are useful if you want to add a few more frames to account for dissolves or additional trimming.
HDCAM : A high definition digital videotape recorder format that records an 8-bit, 7.1:1 DCT compressed component video signal with 3:1:1 color sampling. Recorded using 1/2 inch tape. Supports four tracks of audio.
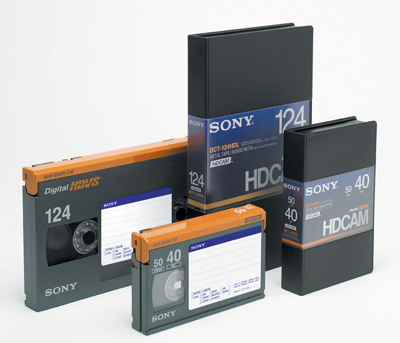
HDV : An MPEG-2–based high definition video format that records on a DV cassette
tape. HDV supports both 720p and 1080i, and uses interframe (or long-GOP MPEG-2)
compression. Depending on the format, HDV has a data rate of 19 Mbps or 25 Mbps.
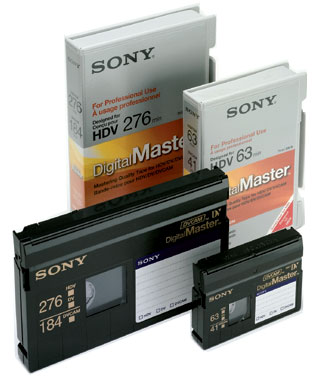
Note : HDV can also be recorded on standard DV tape.
head clip : The clip that begins a sequence.
headroom : 1. The available range in decibels (dB) that falls in between the reference level
that is used to denote the average loudness of a mix and 0 dBFS. If you mix your
project with the reference level set to –12 dBFS, you have 12 dB of headroom available
before the signal is clipped. If the audio in a sequence has a wide dynamic range, you
set the reference level low enough to create enough headroom so that no part of the
signal goes above 0 dBFS.
2. The amount of space between the top of a subject's head and the top of the frame when shooting.
Hi-8 : An analog videotape format. Introduced as a higher quality version of 8 mm.
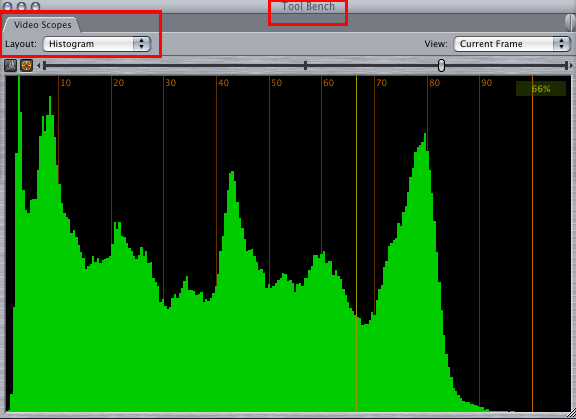
Histogram : A video scope in Final Cut Pro that displays the relative strength of all luma values in a video frame, from black to super-white. It is useful for comparing two clips in order to match their brightness values more closely.
hue : An attribute of color perception, also known as color phase. Red, blue, yellow, and green are all different hues.
Glossary of Video Terms: I-P
(Work in progress)
Please note : Many of the terms and definitions contained within this glossary are copyright Apple Computer Inc. and may not be reproduced without permission from Apple. Items listed in blue are LAFCPUG moderator contributed definitions.
I
image sequence: A movie exported as a series of numbered image files, stored in a folder. Each image file contains one frame of video. The Targa and TIFF file formats are commonly used to export image sequences for file interchange among different film compositing workstations.
importing: The process of bringing files of various types into a project in Final Cut Pro. Imported files can be created in another application, captured from another device, or brought in from another Final Cut Pro project.
IMX: A standard definition, all–I-frame MPEG-2 format stored on tape, optical disc, or disk drive. Some IMX decks can play back and convert formats such as Digital Betacam, Betacam SX, and Betacam SP to IMX. The data rate of IMX can be set to 30-, 40-, or 50 Mbps.
incoming clip: The clip to which a transition segues. For example, if Clip A dissolves to Clip B, Clip B is the incoming clip.
In point: The edit point that specifies the first frame of a clip to be edited into a sequence.
insert edit: An edit in which a clip item is added to a track in the Timeline at a specified point, moving clips (or parts of clips) after that point to the right. An insert edit does not replace existing material.
interlaced video: A scanning method that divides a video frame into two fields, each consisting of alternating odd and even lines, which are scanned at different times.
IRE (Institute of Radio Engineers): Also refers to an analog video signal unit of measurement for luma, established by the Institute of Radio Engineers.
ITU: Abbreviation for International Telecommunications Union.
J
JBOD: Just a Bunch of Disks. A system setup where several disks are used for storing data, as opposed to a RAID, where the disks reference and provide backup to each other.
J-cut: See split edit.
jog: To move forward or backward through video or audio one frame at a time.
jog control: A control at the bottom of the Viewer, Canvas, and Log and Capture window that allows you to move forward or backward through audio or video as slowly as one frame at a time. Useful for carefully locating a specific frame.
JPEG: A popular image file format that lets you create highly compressed graphics files. The amount of compression used can be varied. Less compression results in a higher quality image. Uses the file extension .jpg or sometimes .jpeg
jump cut: A cut in which an abrupt visual change occurs between two shots, with no continuity from one to the other.
K
keyframe: A special-purpose control that denotes a change in value in a filter or motion parameter. When two keyframes with different values are set in Final Cut Pro, a transition from one value to another is calculated, resulting in a dynamic change to that parameter. For example, two center point keyframes with different values will result in animated motion for that clip.
keying: A technique used to eliminate specific background areas of video in order to isolate and composite specific foreground elements against a different background. See also blue or green screening and luma key.
keyframe graph: Located in the Control and Filters tabs of the Viewer, displays all keyframes and parameter values of a clip’s motion and filter attributes.
L
labels: Terms such as “Best Take” and “Interview” that appear in the Label column of the Browser. You can assign labels to clips and media to help distinguish and sort them. Each label has an associated color that is also applied to clips.
layout: Refers to the size and location of windows in Final Cut Pro. Final Cut Pro comes with a selection of predefined layouts, and you can create and save custom layouts. Choose a layout that maximizes your screen space in the best way for your source material, editing focus, screen resolution, and monitor type.
L-cut: See split edit.
lift edit: An edit in which one or more items is deleted and a gap appears where the deleted items existed. Does not affect other clips in the sequence.
linear editing: A video editing style in which a program is edited together by copying shots from the original source tapes to a master tape, one by one. Because the assembly is linear, any changes in duration made to an earlier point of the tape require reassembling the movie from that point forward. Compare with nonlinear editing.
link: To connect video and audio clip items in the Timeline so that when one item is selected, moved, or trimmed, all other items linked to it are affected.
linked clip: A clip item that is connected to one or more other clip items, so that when you select it you also select the associated clips. You link clip items to keep them in sync with one another.
linked selection: An option in the Timeline that, when enabled, selects all clip items linked to the item you select. When linked selection is turned off, linked items are not selected and edited as if they are linked, but the items remain linked together.
link indicators: In the Timeline, lines under clip names that indicate that the clips are linked.
Linking button: A button in the upper-right corner of the Timeline that turns the linked selection option on and off.
Lock Track control: The lock icon, near the beginning of tracks in the Timeline, that you click to lock and unlock tracks. See locked track.
locked track: A track whose contents cannot be moved or changed. In the Timeline, a locked track is distinguished by cross-hatched lines across the track. You can lock or unlock tracks at any time by clicking the Lock Track control in the Timeline.
log and capture: In Final Cut Pro, the process of logging the clips you want to capture, and then using device control to automatically capture them in the Log and Capture window.
Log and Capture window: In Final Cut Pro, the window used to enter information about clips from source tapes, and to capture media files so you can edit them.
logging: The process of entering detailed information about the clips that you want to use from your source tapes, in preparation for capturing them from videotape.
logging bin: In Final Cut Pro, the specified bin where all clips that are logged or captured using the Log and Capture window are stored.
looping: A playback mode in which clips and sequences go back to the beginning whenever the playhead reaches the end of the media. The Loop Playback command is in the View menu.
LTC: Stands for longitudinal timecode. A method of writing timecode to a dedicated timecode or audio track of an audio or video recorder. Compare with VITC.
luma: Short for luminance. A value describing the brightness of a video image. A luma channel is a grayscale image showing the range of brightness across the whole clip.
luma key: A filter used to key out pixels of a certain luma value (or a range of luma values), creating a matte based on the brightest or darkest area of an image. Keying out luma values works best when your clip has a large discrepancy in exposure between the areas that you want to key out and the foreground images you want to preserve, such as a white title on a black background. See keying and matte.
luminance: See luma.
M
markers: In Final Cut Pro, points of reference in clips and sequences. Markers can be placed directly in clips, or they can be placed in sequences in the Timeline ruler.
mask: An image or clip used to define areas of transparency in another clip. Similar to an alpha channel.
master clip: A clip in the Browser which controls the relationship to a media file for all other affiliated clips in your project.
Mastering mode: In Final Cut Pro, a mode in the Edit to Tape window that lets you output additional elements such as color bars and tone, a slate, and a countdown when you output your program to tape.
master shot: A wide-angle shot that encompasses the entire scene. Traditionally, this is the first shot that is taken for a scene, and is the shot used as the basis for that scene when editing.
master tape: The final tape that contains a finished program at its highest quality. Master tapes should be suitable for duplication, broadcast, and archiving.
match frame: Match framing allows you to quickly open a master or affiliate clip at the same frame as the current position of the playhead. When the Canvas is active, the Match Frame command opens a sequence clip’s master clip at the exact same frame currently beneath the playhead, and with the same In and Out points set. When the Viewer is active, the Match Frame command moves the Canvas playhead to an occurrence of the current frame showing in the Viewer (if one exists).
match-on-action: A cut from one shot to another with similar action in the frame; for example, cutting from a shot of a woman opening the door outside an apartment to a shot from the interior of the apartment of the door opening and the woman walking in.
matte: Sometimes referred to as a holdout matte. An effect that uses information in one layer of video to affect another layer. Mattes are useful when you want to use one clip to selectively hide or reveal part of another; for example, to reveal parts of a video layer by a round spotlight shape. Matte filters can be used by themselves to mask out areas of a clip, or to create alpha channel information for a clip in order to make a transparent border around the clip that can be composited against other layers.
media: A generic term for elements such as movies, sounds, and pictures.
merged clip: A clip that refers to more than one source media file on disk. Usually, a merged clip refers to a video file and multiple audio files.
mids: Short for midtones. The values in an image between absolute white and absolute black.
mini-DV cassette: A small cassette used for the DV digital videotape format. mixer automation The process of using the Audio Mixer or a control surface to record audio level and pan keyframes.
mixing: The process of adjusting the volume levels of all audio clips in an edited sequence, including the production audio, music, sound effects, voiceovers, and additional background ambience, to turn all of these sounds into a harmonious whole.
mono: Short for monophonic. A type of sound in which each audio channel is handled discretely, or are taken from a tape and mixed together into a single track, using equal amounts of audio channels 1 and 2. Compare with stereo, stereo pair.
montage: A sequence in which a series of different shots are arranged to create a certain mood or theme, or to denote the passage of time.
motion blur: An effect that blurs any clip with keyframed motion applied to it, similar to blurred motion recorded by a camera.
motion path: Lines displayed in the Canvas showing the direction a clip will travel based on positional keyframes applied to the clip.
MPEG: (Moving Picture Experts Group) Acronym for Moving Picture Experts Group. A group of compression standards for video and audio, which includes MPEG-1, MPEG-2, and MPEG-4. Uses the file extension .mpg or sometimes .mpeg
N
nested sequence: A sequence that is edited into another sequence.
NLE: Short for nonlinear editor. See nonlinear editing.
noise floor: The background noise generated by audio equipment during recording, which inadvertently becomes a part of the recording.
non-drop frame timecode: Timecode in which frames are numbered sequentially without dropping any frames from the count. When discussing NTSC video, the video frame rate is actually 29.97 fps, and non-drop frame timecode is off by 3 seconds and 18 frames per hour in comparison to actual elapsed time. Compare with drop frame timecode.
non-interlaced video: The standard representation of images on a computer. Also referred to as progressive scan. The monitor displays the image by drawing lines, one after another, from top to bottom.
nonlinear editing: A video editing method in which edits within a program can be changed at any time without having to re-create the entire program. When you use a nonlinear editing application to edit a program, all footage used is stored on a hard disk rather than on tape. This allows random access to all video, audio, and images as you edit. Compare with linear editing.
NTSC format: The video standard defined by the National Television Standards Committee, the organization that originally defined North American broadcast standards. NTSC video has a specifically limited color gamut, is interlaced, has a frame size of 720 x 486 pixels (720 x 480 for DV), and a frame rate of 29.97 fps. Compare with PAL format.
NTSC legal: The range of color that can be broadcast free of distortion according to the NTSC standards.
O
offline: Clips whose media files are currently unavailable to your project. They appear in the Browser with a red slash through them. Clips may be offline because media files haven’t been captured yet or because they’ve been modified in some way. To view these clips properly in your project you must recapture them or reconnect them to their corresponding media files.
offline editing: The process of editing a program at a lower resolution to save on equipment costs or to conserve hard disk space. When the edit is finished, the material can be recaptured at a higher quality, or an EDL can be generated for re-creating the edit on another system.
opacity: The level of a clip’s transparency.
ordered timecode break: A nearly imperceptible gap in the timecode track of a tape that breaks the continuous flow of timecode but doesn’t result in the timecode being reset to 00:00:00:00. See also timecode.
outgoing clip: The clip a transition segues from. For example, if Clip A dissolves to Clip B, Clip A is the outgoing clip.
out-of-sync indicator: In the Timeline, the symbol that appears at the beginning of a clip when a video item moves out of sync with its linked audio items, or vice versa.
Out point: The edit point that specifies the last frame of a clip for use in a sequence. output Sending video or audio signals out of your Final Cut Pro editing system to display on a monitor or record on tape.
overscan: The part of the video frame that cannot be seen on a TV or video monitor. Broadcast video is an overscan medium, meaning that the recorded frame size is larger than the viewable areas on a video monitor. The overscan part of the picture is usually hidden behind the plastic bezel on the edge of a television set. While you are editing, you can use the action safe area to indicate the approximate portion of a frame that is hidden because of overscanning.
overwrite edit: An edit in which the clip being edited into a sequence replaces frames that are already in the sequence.
P
P2: (Professional Plug-in) A compact solid-state memory card designed for professional and broadcast media gathering. Since they have no moving parts, these cards are compact and sturdy as well as resistant to heat and cold. P2 cards typically store DVCPRO or DVCPRO 50.
PAL format: Acronym for Phase Alternating Line, a 25 fps (625 lines per frame) interlaced video format used by many European countries. PAL has a frame size of 720 x 546. Compare with NTSC format.
Parade scope: A waveform monitor mode that shows the video signal as separate red, green, and blue waveforms. Useful for comparing the relative levels of reds, greens, and blues between two clips, or within a single clip.
peak: (1) Short, loud bursts of sound that last a fraction of a second. In spoken dialogue, letters like P, T, and K at the beginnings of words can result in little peaks if the person speaking is close to the microphone. (2) Occurrences of clipped audio appearing in Final Cut Pro as 0 dBFS peaks. Excessive peaks tend to indicate that the audio was recorded at unsuitable levels. A command in the Tools menu, Mark Audio Peaks, lets you identify 0 dBFS audio peaks in clips or sequences.
peak meter: A digital audio meter that displays the absolute level of an audio signal as it plays. So named because every peak in the signal can be accurately seen.
phase: (1) In audio, the timing relationship between two identical, or similar, audio signals. (2) In video, the timing relationship between the composite video chroma signal and the chroma subcarrier signal which determines the hue.
PICT: A still-image file format developed by Apple Computer. PICT files can contain both vector images and bitmap images, as well as text and an alpha channel. PICT is a common image format on Mac OS X computers. Uses the file extension .pct or sometimes .pict
pixel: One dot in a video or still image. A typical medium-resolution computer screen is 1024 pixels wide and 768 pixels high. Digital video movies for the web are often 320 pixels wide and 240 pixels high.
pixel aspect ratio: The width-to-height ratio for the pixels that compose an image. Pixels on computer screens and in high definition video signals are square (1:1 ratio). Pixels in standard definition digital video signals are non-square. playhead A navigational element in the Viewer and Canvas scrubber bar and in the Timeline. It corresponds to the frame displayed in the Canvas and the Viewer. You drag the playhead to navigate through a sequence.
postproduction: The phase of film or video editing in which all of the production elements are organized, assembled, and output for the distribution phase.
preset: A saved group of settings, such as capture, device control, and sequence settings. Presets determine properties such as frame rate, editing timebase, and capture interfaces. Presets are usually defined for particular video formats and workflows, and can be grouped together into Easy Setups.
Print to Video: A command in Final Cut Pro that lets you send clips or sequence to your video or audio outputs for recording on tape.
proc amp: Short for processing amplifier. A specific piece of equipment that allows you to adjust video levels on output.
program: The movie you may create in Final Cut Pro. May consist of multiple sequences or one or more clips.
project: In Final Cut Pro, the file that holds all of the elements of your movie, such as clips, bins, and sequences. Media files are stored separately from a project file. pull-down insertion The process of adding fields and frames to convert 23.98 or 24 fps video to NTSC or PAL (29.97 or 25 fps, respectively).
PsF: Means: [i]Progressive Segmented Frame[/i]
and sometimes is referred to as: [i]Progressive Sequential Fields[/i]
This is where a progressive frame is split up into two parts and spread across an interlaced format such as PAL or NTSC or 1080i but retains the progressive look.
pull-down pattern: A method of inserting frames and fields into a video stream to output 23.98 or 24 fps video to an NTSC or PAL device. See also 3:2 pull-down, 2:3:3:2 pull-down, 2:2:2:4 pull-down, 24@25 pull-down, and 24@25 repeat.
Glossary of Video terms Q-Z
(Work in progress)
Please note : Many of the terms and definitions contained within this glossary are copyright Apple Computer Inc. and may not be reproduced without permission from Apple. Items listed in blue are LAFCPUG moderator contributed definitions.
Q
QuickTime: Cross-platform multimedia technology from Apple. Widely used for editing, compositing, CD-ROM, web video, import and export, and more.
QuickTime Streaming: The streaming media addition to the QuickTime architecture. Used for viewing QuickTime content in real time on the web.
QuickView tab: Provides an alternate way of viewing effects in a sequence outside of the Canvas as you work. It takes advantage of the ability of Final Cut Pro to cache frames of your sequence as you play it. This is useful for fast previews of complex composites and effects. It’s also a good way to see how your final composite looks if you are zoomed in to the Canvas while making adjustments.
R
RAID (Redundant Array of Independent Disks): A method of providing nonlinear editors with many gigabytes (GB) of high-performance data storage by formatting a group of hard disks to act in parallel as a single drive volume. There are different ways of creating a RAID, but for digital video editing the most common is referred to as a Level 0 RAID. The performance of a group of hard disks striped together as an array is much higher than that of the individual drives.
RAM (Random Access Memory): A computer’s memory capacity, measured in megabytes (MB), which determines the amount of data the computer can process and temporarily store at any moment.
Range checking: Options that enable zebra striping to immediately warn you of areas of a clip’s image that may stray outside of the broadcast legal range. razor blade edit An edit in which a single clip is cut into two clips.
raw data: Uncompressed data. real-time effects Effects that can be applied to clips in an edited sequence and played back in real time, without requiring rendering first. In Final Cut Pro, the real-time effects architecture is known as RT Extreme.
recapture: To capture a clip’s media file again. Usually done to eliminate unused material in order to capture only the media files necessary to create your finished program at full resolution.
record monitor: In a linear editing suite, a monitor that displays the edited master tape. A record monitor corresponds to the Canvas in Final Cut Pro.
redigitize: To digitize clips again. Also referred to as recapturing.
reel: Identifies the source tape from which a clip was captured. You specify a clip’s reel number in the Logging tab of the Log and Capture window. This is typically entered when logging, but you can also change it in the Browser or Item Properties window.
render: To process video and audio with any applied filters or transitions, and store the result on disk as a render file. Effects that aren’t real-time must be rendered to play back properly. Once rendered, your sequence can be played in real time.
render files: Files that Final Cut Pro generates when you render transitions and effects. Render files are saved to the specified scratch disk.
render status bars: Two slim horizontal bars, at the top of the Timeline, that indicate which parts of the sequence need to be rendered. The top bar is for video and the bottom for audio. Different colors indicate the render or real-time playback status of a given section of the Timeline.
replace edit: A specialized form of overwrite edit which aligns the frame at the playhead of the Viewer clip to the frame at the playhead of the sequence clip, replacing only the content of the sequence clip, even if no In or Out points are set. This is useful for replacing clips based on a matching a common visual event in the frame, such as a slate closing or an actor’s movement.
reset timecode break: A break that results in a tape’s timecode being reset to 00:00:00:00. See also timecode.
resize edit: An edit in which the duration of a clip in the Timeline is changed by moving its In or Out point.
Resize pointer: A cross-shaped pointer with small arrows pointing left and right that indicate the directions in which an edit point can be moved. The Resize pointer appears when you move the pointer to the boundary of a clip item or transition in the Timeline.
reverse shot: A typical example of a reverse shot is a cut to the second person in a conversation; for example, an interviewer asking the next question after the interviewee has finished speaking.
RGB: Abbreviation for Red, Green, and Blue. A color space commonly used on computers in which each color is described by the strength of its red, green, and blue components. This color space directly translates to the red, green, and blue phosphors used in computer monitors. The RGB color space has a very large gamut, meaning it can reproduce a very wide range of colors. This range is typically larger than the range that can be reproduced for broadcast.
ripple edit: An edit in which the start and end times of a range of clips on a track are adjusted when the duration of an earlier clip is altered.
roll edit: An edit that affects two clips that share an edit point. For example, if Clip A cuts to Clip B, a roll edit simultaneously adjusts the Out point of Clip A and the In point of Clip B by the same amount. The overall duration of the sequence stays the same.
room tone: The low level of background noise that exists in any recording. In order to edit out unwanted sections of audio without creating obvious gaps of silence, it’s common practice to record a certain amount of extra room tone during a shoot. You can edit in the room tone whenever you need to cover a gap that was cut in the location audio.
rotation: In the Motion tab of the Viewer, the rotation value determines how many times a clip circles around its center axis, without changing shape.
rotoscoping: The process of manipulating or painting on individual frames. Usually used to describe the act of tracing, frame by frame, a foreground element to be isolated from the background of the frame.
rough edit: The first editing pass. The rough cut is an early version of a movie that pulls together its basic elements. Often, a rough edit is performed prior to adding transitions, filters, and other effects.
ruler:
1. The measurement bar along the top of the Timeline, which represents the total duration of an edited sequence. Also displays the timecode corresponding to the location of clips in the Timeline. You can move the playhead in the ruler in order to navigate through clips in a sequence.
2. In the Transition Editor, a ruler displays a close- up view of the frames surrounding the transition in the sequence.
3. In the Audio tab of the Viewer, a ruler above the waveform display area shows the range of the currently displayed clip.
S
sampling: The process of measuring an analog signal and converting it into a digital value. For example, the sampling rate of an audio stream specifies how many samples are captured. Higher sample rates yield higher-quality audio.
SAN: (storage area network) A network that connects computer systems to a shared storage area. The shared storage is typically a group of disk arrays (RAIDS) grouped together and managed via software (such as Xsan).
saturation: A measurement of chroma, or the intensity of color in the video signal. scale In the Motion tab of the Viewer, an adjustable value that changes the overall size of a clip. The proportion of the image may or may not be maintained.
scene: A series of shots that take place at the same time in the same location. A series of scenes make up a program.
scratch disk: The disk or disk space you allocate in Final Cut Pro for digital video capture and editing, as well as for the storage of a project’s render files.
script: A set of instructions that performs a specific function, similar to programming. FXScript allows you to create custom scripts for use in Final Cut Pro. You can use FXscript to create custom filters, transitions, and generators.
scrub: To move through a clip or sequence with the aid of the playhead. Scrubbing is used to find a particular point or frame.
scrubber bar: The bar at the bottom of the Viewer and the Canvas. You can speed up or slow down playback in forward or reverse by moving the playhead along the scrubber bar.
Scrub Video tool: A tool used to change the thumbnail of a clip displayed when the Browser is in icon view.
SECAM: (Sequential Couleur Avec Memoire) The French television standard for playback. Similar to PAL, the playback rate is 25 fps and the frame size is 720 x 576.
sequence: An arranged series of video, audio, and graphics clips, edit information, and effects edited together to create a program. A sequence can contain your entire edited program or be limited to a single scene. Sequences can also be edited into other sequences, referred to as nested sequences.
sequence clip: A clip that has been edited into a sequence. A sequence clip is typically an affiliate clip whose master clip is located in the Browser. Compare to master clip.
Selection tool: In Final Cut Pro, the default arrow-shaped pointer, which allows you to select items in the interface. For example, you use it to select a clip or edit point. You can choose the Selection tool by pressing the A key.
SGI: An uncompressed image file format popular on the IRIX operating system on SGI workstations. Stores images with millions of colors+. Can contain an alpha channel. shortcut menu A menu you access by holding down the mouse button and the Control key, or by pressing the right mouse button.
shot: A segment of uninterrupted captured video. A shot is the smallest unit of a program.
shuffle edit: An edit in which a clip is moved from one position in an edited sequence to another by insertion. All clips between these two positions are moved to the left or right to fill the space left by the clip you moved. The shuffled clips don’t change their duration, so the overall duration of your sequence is not affected.
shuttle: To drag the slider on the shuttle control to the right to fast-forward and to the left to rewind. Playback speed varies depending on the distance of the slider from the center of the control.
shuttle control: The slider control located at the bottom of the Viewer and the Canvas. This control is useful for continuous playback at different speeds, in fast and slow motion. It also shifts the pitch of audio as it plays at varying speeds. signal-to-noise ratio The ratio between the average loudness of the subject and the background noise in a recording. Background noise can be many things—tape hiss, the rustle of clothes, or the rumble of traffic. It’s important that the signal-to-noise ratio of your recorded clips be fairly high, so that actors’ voices are comprehensible and clear.
slate: A small board shot at the beginning of a scene, which identifies the scene with basic production information such as the take, date, and scene number. The slate may also contain a chip chart to aid in color correcting the scene. A clapper provides an audiovisual cue for synchronization of dual system recordings.
slide edit: An edit in which an entire clip is moved, along with the edit points on its left and right. The duration of the clip being moved stays the same, but the clips to the left and to the right of it change in length to accommodate the new position of the clip. The overall duration of the sequence and of these three clips remains the same.
slider: In Final Cut Pro, an interface element that can be dragged forward or backward in order to make an adjustment. Sliders can be found in the Motion tab of the Viewer, as well as in filters and generators applied to a clip.
slip edit: An edit in which the location of both In and Out points of a sequence clip are changed at the same time, without changing the location or duration of the clip. This is referred to as slipping because you slip a pair of In and Out points inside the available footage.
slug: A generator in Final Cut Pro used to create black video in a sequence. A slug can be used to represent a video clip that has not yet been placed.
SMPTE: (Society of Motion Picture and Television Engineers) The organization responsible for establishing various broadcast video standards. Established the SMPTE standard timecode for video playback.
snapping: A setting in the Timeline that affects the movement of the playhead. When snapping is enabled, the playhead “snaps,” or moves directly, to markers or edit points when it is moved close to them.
Snapping button: A button icon in the upper-right corner of the Timeline that you click to turn snapping on and off.
SOT: (sound on tape) Audio recorded on analog or digital video formats (audio and video).
soundtrack: The audio that accompanies a program’s video. sound bite Typically a short excerpt from an interview clip, as used on news shows. sound effects Specific audio material, such as the sound of a door closing or a dog barking, from effects libraries or from clips you recorded. Sound effects can be used to replace sounds in the location audio of a program, or to add sound that wasn’t originally recorded.
sound recordist: The individual on a film or video crew responsible for setting up the audio recording equipment, and for setting the levels and managing the audio recording during a shoot.
source media files: The original QuickTime files captured to disk. The clips you use in Final Cut Pro are pointers that represent your media files, but changes made to clips within Final Cut Pro do not affect the media files on disk.
source monitor: In a linear editing suite, a monitor that displays source tapes before recording them to the master tape. In Final Cut Pro, the Viewer acts as the source monitor.
source tape: The video and audio tapes that were originally recorded during a shoot. Media files are captured from the source tapes, edited, and ultimately output to a final master tape.
special effects: Visual effects applied to clips and sequences, such as motion effects, layering, and filters. speed indicators Display the speed of clips in a sequence using tic marks. The spacing and color of these tic marks indicate the speed and playback direction of the clips.
split edit: An edit in which the video or audio items of a clip ends up being longer than the other; for example, the sound is longer than the video at the head of the clip, so it is heard before the video appears. Also referred to as an L-cut or J-cut.
splits: A method of delivering an audio mix of programs destined for foreign language distribution, typically using a multitrack audio recorder. Separate mixes for dialogue, music, and sound effects are recorded to separate pairs of audio tracks to make redubbing the dialogue and remixing it back together easier.
static region: An area in a sequence in the Timeline that you lock so that it is visible even when you scroll to see other tracks. It can contain audio tracks, video tracks, or both. When you create a static region you get three regions in the Timeline: a top, scrollable region for the other video tracks, a middle static region, and a bottom scrollable region for the other audio tracks. You can’t scroll up or down in the static region, but you can resize it to accommodate more or fewer tracks.
stereo, stereo pair: Short for stereophonic, in which audio contains two different channels. Stereo pairs are linked and are always edited together. Audio level changes are automatically made to both channels at the same time. A pair of audio items may have their stereo pairing enabled or disabled at any time. Compare with mono.
storyboard: A series of pictures that summarizes the content, action, and flow of a proposed project. When using the Browser in icon view, clips can be arranged visually, like a storyboard. When dragged as a group into the Timeline, the clips will be edited together in the order in which they appear in the Timeline, from left to right and from top to bottom.
straight cut: A cut in which both the video and audio clip items are cut at the same time.
streaming: The delivery of media over a computer network.
subclip: A clip that represents a portion of a clip’s media file.
superimpose edit: An edit in which a source clip item is placed into a track above a clip item that’s already in the Timeline at the position of the playhead. If no In or Out points are set in the Timeline and Canvas, the previously edited clip’s In and Out points are used to define the duration of the incoming clip. Superimpose edits are used to overlay titles and text onto video, as well as to create other compositing effects.
super-black: Black that is darker than the levels allowed by the CCIR 601 engineering standard for video. The CCIR 601 standard for black is 7.5 IRE in the United States, and 0 IRE for PAL and for NTSC in Japan. For example, in the United States, 0 IRE would be considered super-black.
Super 8: A film format for widescreen presentations, with a 4:3 aspect ratio.
Super 16: A film format for widescreen presentations, with a 15:9 (1.66) aspect ratio. Super 16 is frequently used when shooting a project intended to be blown up to 35 mm.
super-white: White that is brighter than 100 IRE, the maximum level allowed by the CCIR 601 engineering standard for video.
S-Video: A high-quality video signal for high-end consumer video equipment. The image looks sharper and has better color than composite video because S-Video sends the color and brightness information separately, keeping the signals cleaner. Most low-cost analog-to-digital video interfaces use S-Video as their highest quality video signal. Also known as Y/C.
swap edit: See shuffle edit.
sweetening: The process of creating a high-quality sound mix by polishing sound levels, rerecording bad sections of dialogue, and recording and adding narration, music, and sound effects.
sync: The relationship between the image of a sound being made in a video clip (for example, a person talking) and the corresponding sound in an audio clip. Maintaining audio sync is critical when editing dialogue.
T
tabs: In Final Cut Pro, tabs delineate projects in the Browser, sequences in the Canvas and Timeline, and functions within the Viewer. You click a tab to open a project or go to a specified function window, such as Video, Audio, Filters, or Motion. Tabs can also be dragged out of the main window to create a separate window.
tail clip: The last clip in a sequence, or the clip on the rightmost side when looking at an edit point between two clips.
tape-to-tape editing suite: An editing facility that uses automated switching equipment to assemble a finished program from the original source tapes using the instructions contained in an EDL.
TARGA: An uncompressed image file format that stores images with using “millions of colors+” for the color depth. TARGA files are supported by nearly every platform and media application. The “+” indicates an alpha channel.
telecine: A machine that converts the images on film negatives to a videotape format. A telecine is necessary if you shot your project on film and you want to edit it on video.
three-point editing: An editing technique in which three out of four In and Out points are set in a Browser clip and a sequence. When the edit is performed, the fourth edit point is calculated automatically by Final Cut Pro.
thumbnail: The first frame of a clip, shown as a tiny picture for reference. In Final Cut Pro, the thumbnail is, by default, the first frame of a clip. You can change the frame, known as the poster frame, used as that clip’s thumbnail by using the Scrub Video tool.
thumb tabs:
1. Small tabs between the audio and video scroll bars in the Timeline that define separate groups of audio or video tracks with their own scroll bars. For example, if you have more audio tracks than video tracks, you can use the thumb tabs between your audio and video scroll bars to allocate more space to your audio tracks.
2. Small tabs on either side of the Zoom slider that you drag to zoom in or out of a sequence. TIFF (Tagged Image File Format) A widely used bitmapped graphics file format, developed by Aldus and Microsoft, that handles monochrome, grayscale, 8- and 24-bit color. Can have alpha channels.
timecode: A signal recorded with your video that uniquely identifies each frame on tape. The SMPTE format for timecode is hours: minutes: seconds: frames.
timecode gap: An area of tape with no timecode at all. Timecode gaps usually signify the end of all recorded material on a tape, but timecode gaps may occur due to user error, such as fast-forwarding too far past a section of previously recorded material and recording additional footage. Video occurring after a timecode gap begins with a timecode value of 00:00:00:00. See also reset timecode break.
Timeline: A window in Final Cut Pro that displays a chronological view of an open sequence. Each sequence has its own tab in the Timeline. You can use the Timeline to edit and arrange a sequence. The order of the tracks in the Timeline determines the layering order when you combine multiple tracks of video. Changes you make to a sequence in the Timeline are seen when you play back that sequence in the Canvas. If you modify clips in the Canvas, those changes can be seen in the Timeline. Note that the Canvas and Timeline only display sequences that are currently open.
Timeline patch panel: The section at the left of the Timeline containing the Audio, Source and Destination, Track Visibility, Lock Track, and Auto Select controls.
time remapping: The process of moving a frame in a clip to another time relative to the Timeline. All frames in that clip from the beginning of the clip to that keyframe are either sped up or slowed down to accommodate the new duration that’s been specified.
title safe area: Part of the video image that is guaranteed to be visible on all televisions. The title safe area is the inner 80 percent of the screen. To prevent text in your video from being hidden by the edge of a TV set, you should restrict any titles or text to the title safe area. Compare with action safe area.
Tool Bench: A window in Final Cut Pro that contains interface elements that you can use to supplement information displayed in the Viewer and Canvas. The Tool Bench can contain up to five tabs—Audio Mixer, Frame Viewer, QuickView, Video Scopes, and Voice Over.
Tool palette: A window in Final Cut Pro that contains tools for selecting, editing, zooming, cropping, and distorting items in the Timeline. All tools in the Tool palette can also be selected using keyboard shortcuts.
track header: The area in the patch panel that contains controls for each track. tracks Layers in the Timeline that contain audio or video clip items in a sequence. Also refers to the separate audio and video tracks on tape or within media files. Final Cut Pro allows up to 99 video and 99 audio tracks to be used in a single sequence.
track strips: In the Audio Mixer, each audio track in the currently selected sequence is represented by a track strip, complete with solo and mute buttons, a stereo panning slider, and a volume fader.
Track Visibility control: A control at the very beginning of each track that you click to enable or disable a track. Disabled tracks don’t play in the Canvas or on an external monitor, nor will they be rendered or output to tape. When a track is disabled, it appears darkened in the Timeline, but its contents remain in your sequence and you can still edit them.
Transition Editor: A specialized editor that appears in the Viewer when you double- click a transition in the Timeline. You can use it to make detailed changes to a transition’s timing and effects parameters. transitions Effects that are applied to edit points to smooth out a change from clip to clip. In Final Cut Pro, you can choose from a variety of video transitions, such as a dissolves or wipes, or you can add an audio cross fade between audio clips.
trimming: 1. Precisely adjusting and defining the In and Out points of a clip.
2.Modifying an edit point in the Timeline by moving it earlier or later.
3. Fine-tuning an edited sequence by making small adjustments to many edits.
Trim Edit window: A window in Final Cut Pro that displays both sides of an edit point. For example, if Clip A cuts to Clip B, the Out point of the Clip A is shown on the left and the In point of Clip B is shown on the right. You can use this window to adjust the edit point between two clips very precisely, frame by frame.
two shot: A scene that includes two people in the frame.
U
underscan To display the entire video frame on a video monitor, so that no part of the frame is masked. Computers display underscan video. Some broadcast monitors have a setting that can enable an overscan video signal to display as underscan. Compare with overscan.
U-Matic An 3/4” analog tape format once popular for broadcast.
V
variable speed Speed that varies dynamically, in forward or reverse motion, in a single clip.
VCR Abbreviation for videocassette recorder. Generally refers to consumer equipment used for recording video from various sources. Sometimes referred to as VTR.
VDU Has 2 definitions, see below.
1. Video Disk Unit This is a FireWire disk recorder that uses a 40 GB hard disk drive as its recording media. The drive attaches directly to professional quality DVCAM camcorders through FireWire, and is capable of recording up to 3 hours of video/audio signals in parallel with tape recording.
2. Visual Display Unit The term used to describe a monitor or other display connected to a computer.
View buttons Use to switch among three different views of the Audio Mixer. Each view has its own set of hidden and displayed track strips.
Vectorscope A window in Final Cut Pro that graphically displays the color components of a video signal, precisely showing the range of colors in a video signal and measuring their intensity and hue. It is a specialized oscilloscope that can be used to calibrate the color in video signals being captured from videotape, as well as to compare two clips for purposes of color correction.
velocity The acceleration or deceleration of a clip’s motion. velocity handle A control you use to change the velocity of a clip’s motion over time. Dragging the velocity handle toward the selected keyframe slows down the clip’s motion at the beginning and speeds it up as it nears the next keyframe. Dragging away from the selected keyframe speeds up the clip’s motion at the beginning and slows it down as it nears the next keyframe.
VHS (Video Home System) An analog videocassette recorder system designed for consumer use.
Viewer A window in Final Cut Pro that you can use to watch individual source clips and set In and Out points in preparation for editing them into your sequence. You can also customize transitions, modify filters, and view and edit various effects. Clips from the current sequence in the Timeline can be opened in the Viewer to refine edits, adjust parameters for effects, and adjust audio volume.
videographer The person responsible for lighting and camera on a video shoot.
video scopes Tools you can use to evaluate the color and brightness values of video clips in the Viewer, Canvas, or Timeline. Video scopes display an analysis of the video frame located at the current playhead position.
Video Scopes tab A tab in the Tool Bench that contains the Waveform Monitor, Vectorscope, Parade scope, and Histogram.
video switcher A device with multiple video inputs that allow you to cut or transition between several sources. Video switchers are commonly used in tape-to-tape editing suites.
video track A track in the Timeline into which you can edit video clip items.
VITC Stands for vertical interval timecode. Timecode that is written into the video signal on the source tapes as they’re being recorded. You can view this timecode as a series of changing, flickering white dots and line segments in one of the scan lines above the active picture on a monitor in underscan or pulse-cross modes. When viewed normally, the line containing the timecode is off the top of the screen. Because it’s part of the video signal, VITC timecode can’t be changed on your original tapes without also replacing the video signal. Compare with LTC.
Voice Over tool Allows you to record audio in Final Cut Pro while simultaneously playing back a specified section of a sequence from the Timeline. Audio can be recorded using any Mac OS X Core Audio-compatible device, such as a USB audio capture device, PCI audio card, or the built-in microphone on a DV camcorder.
VTR Abbreviation for videotape recorder. Generally refers to professional equipment used for recording video from various sources.
VU meter Short for Volume Unit meter. An analog meter for monitoring audio levels.
W
WAVE The primary audio file format used by Windows-compatible computers. WAVE files can be either 8- or 16-bit, and use sample rates from 8 to 48 kHz.
Waveform Monitor A window in Final Cut Pro that displays the relative levels of brightness and saturation in the clip currently being examined. Spikes or drops in the displayed waveforms make it easy to see where the hot spots or dark areas are in your picture.
white balance To make adjustments to a video signal being recorded in order to reproduce white as true white. For example, if the white in a shot is too yellow because of incandescent lighting, white balancing adds enough blue to make the white appear neutral.
white level An analog video signal’s amplitude for the lightest white in a picture, represented by IRE units.
widescreen Any movie presentation that has an aspect ratio wider than 4:3. In movie theaters, 1.85 is considered standard and 2.40 is considered widescreen. For video, 4:3 is considered standard and 16:9 (which is almost the same aspect ratio as 1.85) is considered widescreen. See 16:9.
window burn Visual timecode or keycode information superimposed onto video frames. It usually appears on a strip at the bottom or top of the frame, providing timecode information to the editor without obscuring important details of the picture. wipe A transition in which a geometric or grayscale gradient is used to transition between two different clips.
wipe pattern One of several standard SMPTE wipe transitions recognized by EDLs. Because the EDL format continues to reflect the simplicity of older systems, many Final Cut Pro transitions have no equivalent in a given EDL format. Therefore, during the EDL export process, these new transitions are automatically mapped to the closest approximate SMPTE standard wipe pattern.
Wireframe A view of the outline of a clip’s video frame. Clips in the Viewer and Canvas can be viewed in Wireframe mode.
X
x Refers to the x coordinate in Cartesian geometry. The x coordinate describes horizontal placement in motion effects.
xmeml Abbreviation for eXtensible Media Editing Markup Language. The custom set of markup tags used by the Final Cut Pro XML Interchange Format.
XML Abbreviation for Extensible Markup Language. XML is a method of storing information in an easily accessible yet customizable file format. XML files are plain-ASCII text files used by Final Cut Pro for data exchange among different applications and operating systems.
Xsan Software for clustering multiple hard disk RAIDs together into a storage area network (SAN). Multiple computer systems can read and write to the shared storage area simultaneously, allowing several editors to work in parallel using the same media files.
Y
y Refers to the y coordinate in Cartesian geometry. The y coordinate describes vertical placement in motion effects.
Y'CbCr The color space in which many digital video formats store data. Three components are stored for each pixel—one for luma (Y) and two for color information (CB for the blue difference signal and CR for the red difference signal). Also referred to as YUV.
YUV See See Y'CbCr
Z
zebra stripes Animated diagonal “marching lines” that are superimposed over areas of an image that are very near or exceed the broadcast-legal limits. Zebra stripes are enabled when you use the Final Cut Pro range-checking options.
zoom level The level at which the Viewer, Canvas, or Timeline is magnified. You can adjust the level of precision of your editing by setting the zoom level. For example, by zooming in on the Timeline, you can make changes to a clip’s individual frames. Conversely, you can zoom all the way out to see the entire project and work on very large sections at once.
Zoom slider The slider control that appears at the bottom of the Timeline. The Zoom slider allows you to navigate throughout the total duration of the currently displayed sequence; you can use the thumb tabs on the left and right of the slider to zoom in to and out of a sequence for a more detailed view.